
The Purchase Order module in Quickvee POS lets merchants manage inbound stock from vendors. Create purchase orders by searching for products by name or UPC, set quantities and costs, save as a draft or activate immediately, and receive goods against an active PO — which automatically updates inventory quantities.
Overview
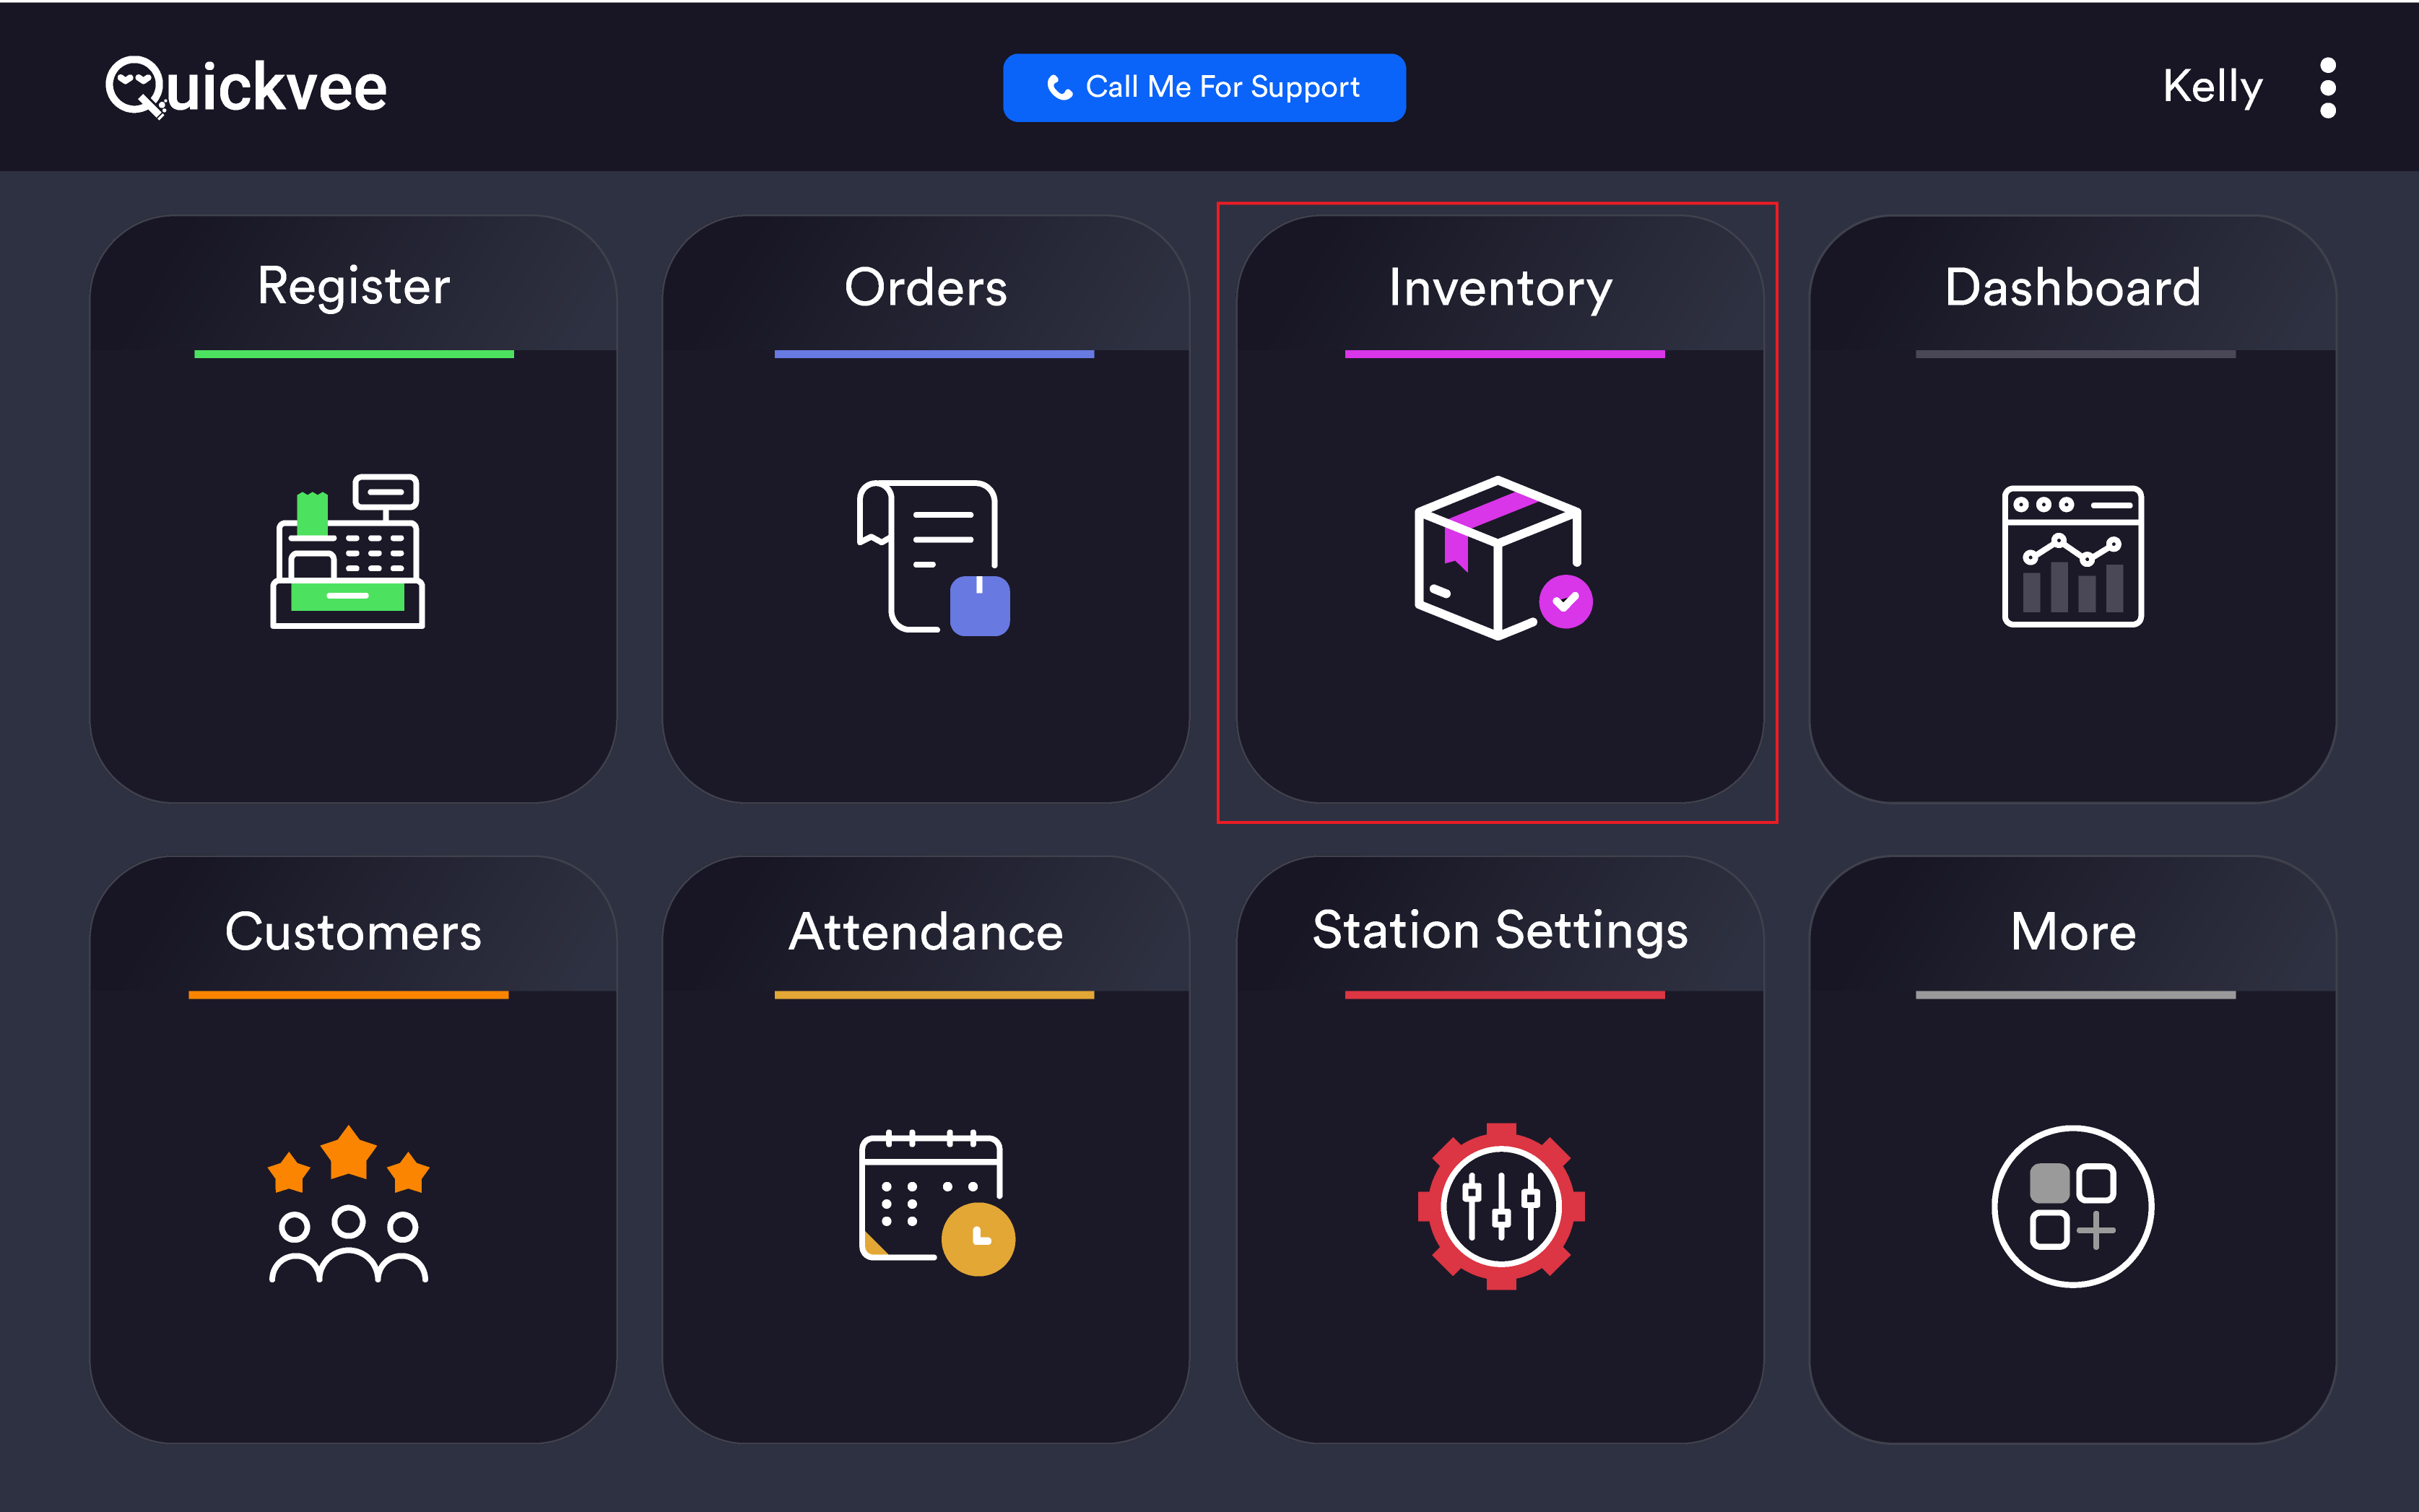
Access path: POS → Inventory → Purchase Order tab
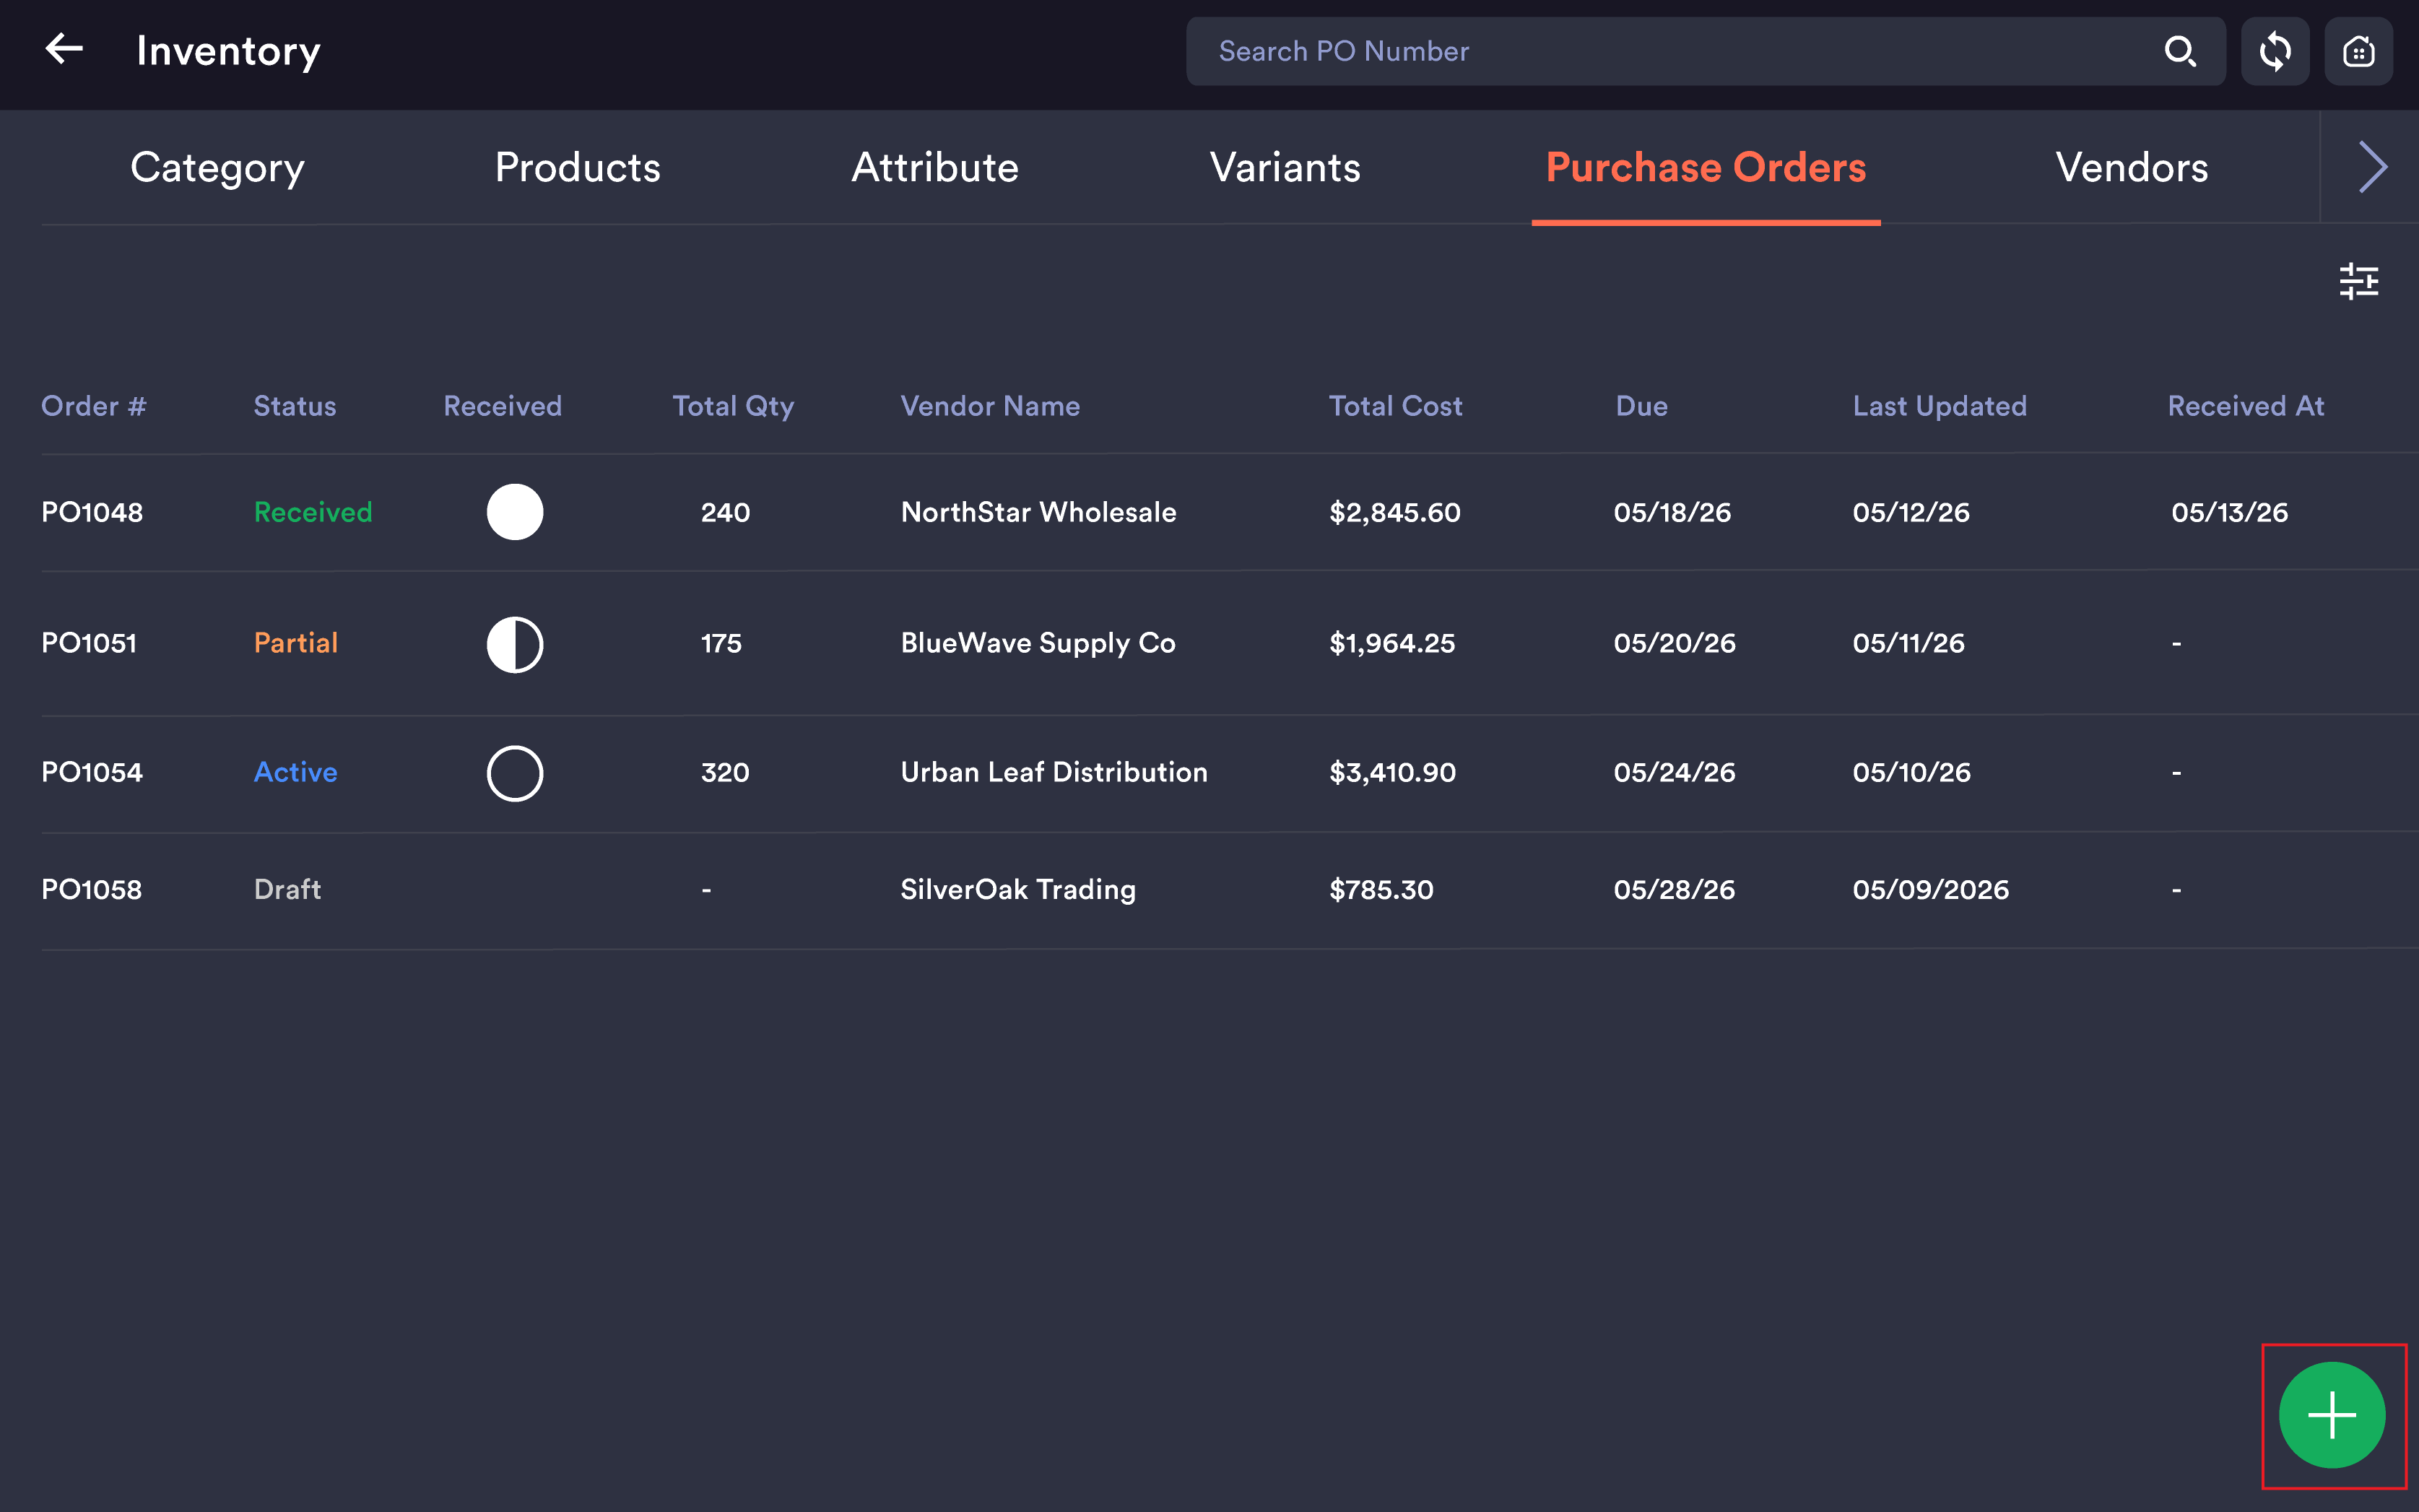
Purchase Order list
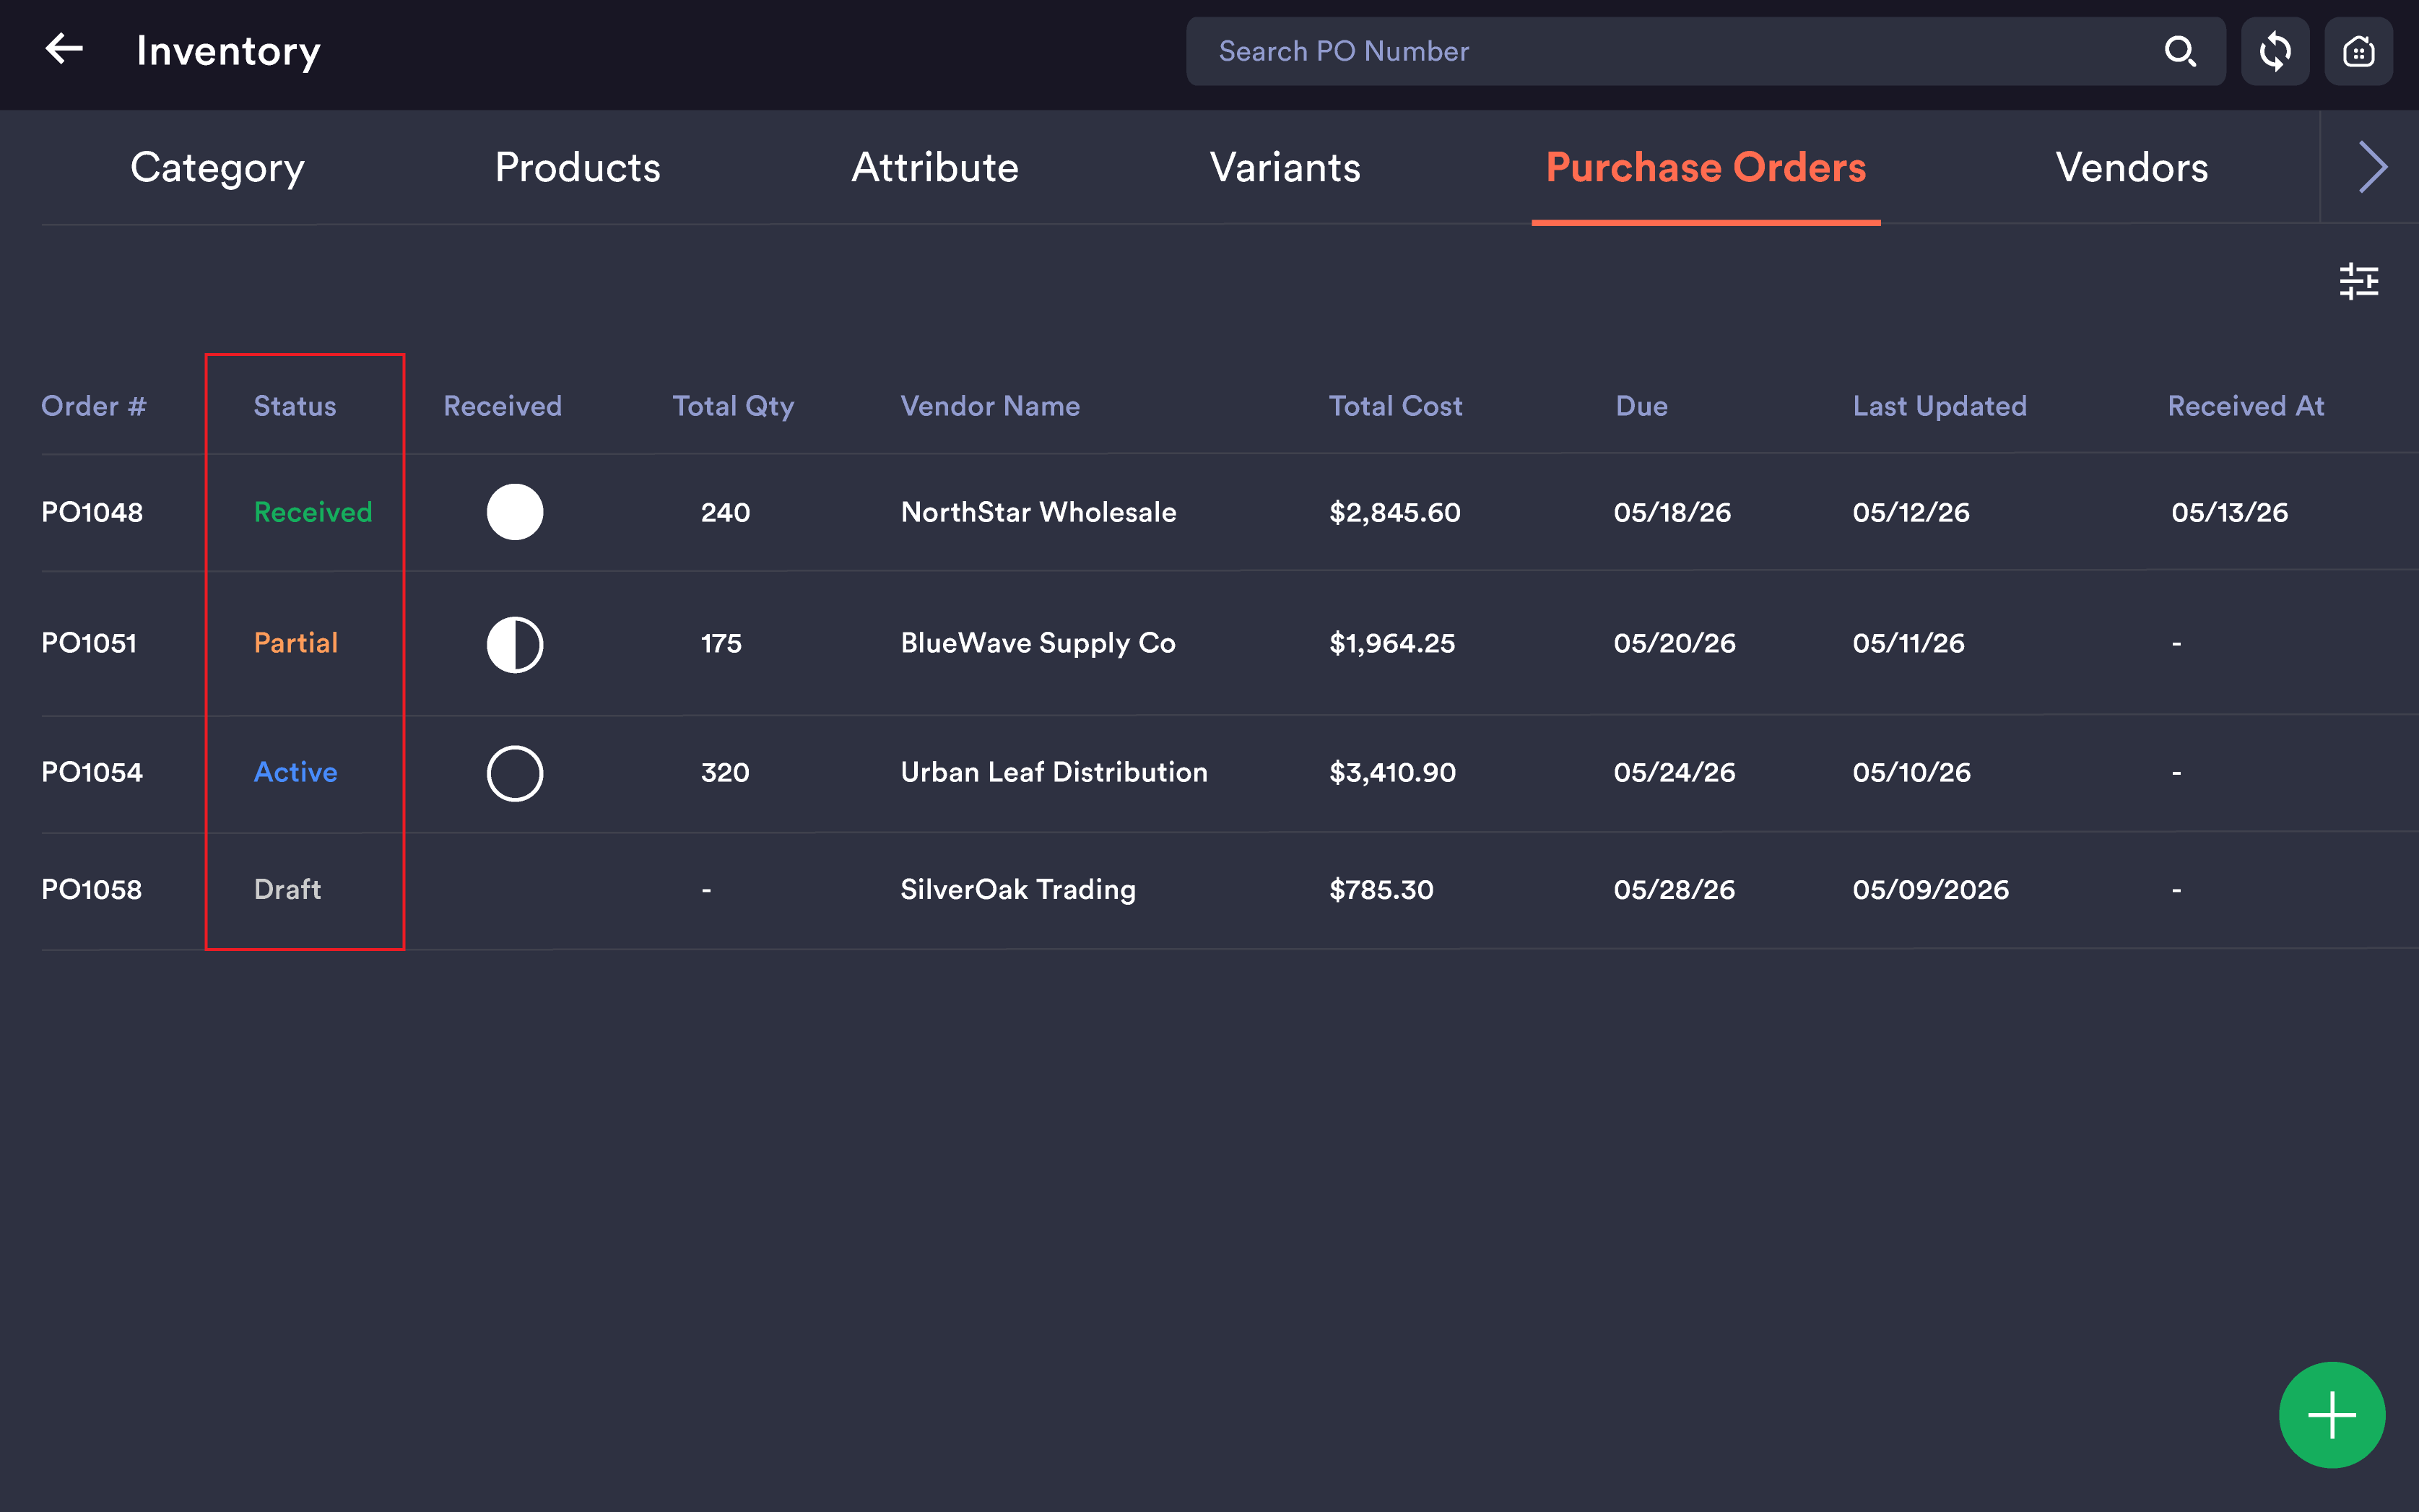
When you open the Purchase Order tab, you see a list of all purchase orders with the following columns:
|
Column |
Description |
|---|---|
|
Order # |
Auto-generated PO number (e.g. PO0071) |
|
Status |
Current state: Draft, Active, Partial, or Received |
|
Received |
Circle indicator — empty (none), half-filled (partial), or filled (all received) |
|
Total Qty |
Sum of all quantities ordered across line items |
|
Vendor Name |
Vendor assigned to the PO; shows blank if none selected |
|
Total Cost |
Auto-calculated sum of all line totals |
|
Due |
Optional expected delivery date; shows |
|
Last Updated |
Timestamp of most recent change |
|
Received At |
Timestamp when PO was fully received; shows |
Search: Use the Search PO Number bar at the top to filter by PO number.
Create new PO: Tap the green (+) button at the bottom-right.
Creating a Purchase Order
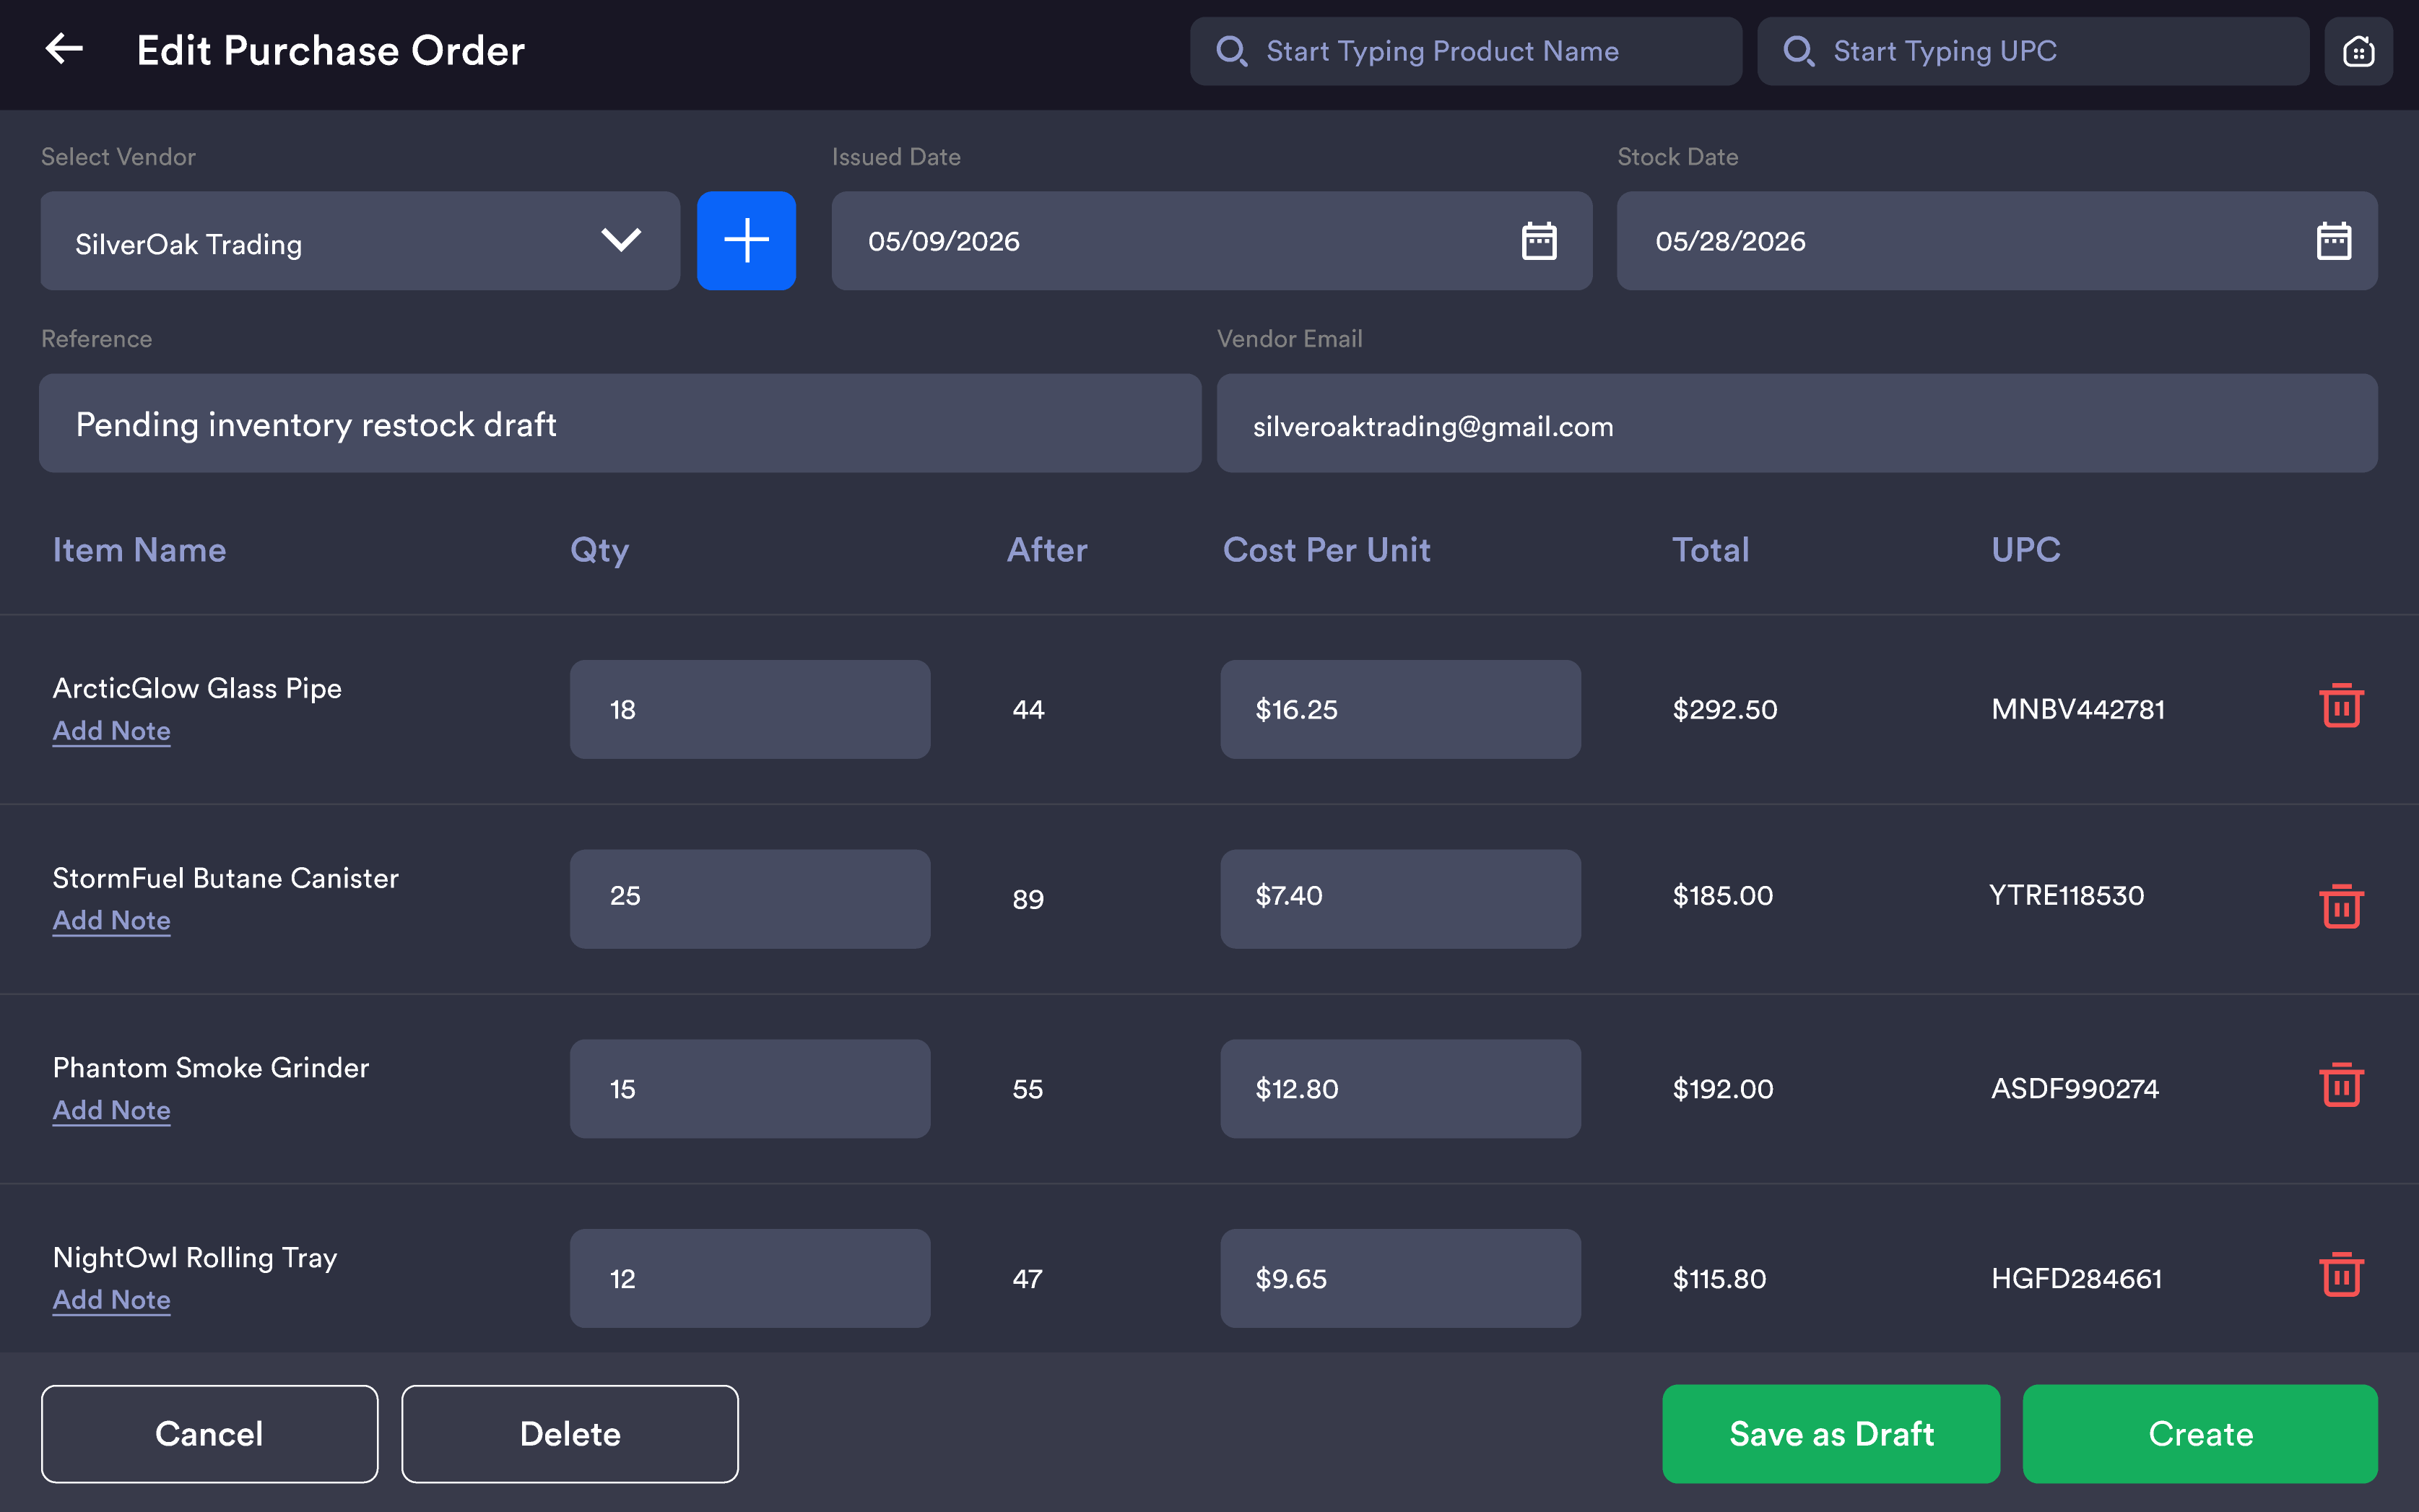
Step 1 — Fill in PO header
|
Field |
Description |
|---|---|
|
Vendor |
Select from existing vendors via dropdown |
|
+ (button) |
Opens inline vendor creation if vendor doesn't exist yet |
|
Issued Date |
Auto-fills with today's date; editable |
|
Stock Date |
Optional — target date for stock count |
|
Reference |
Free-text field for your invoice or reference number |
|
Vendor Email |
Auto-populates from vendor record; editable |
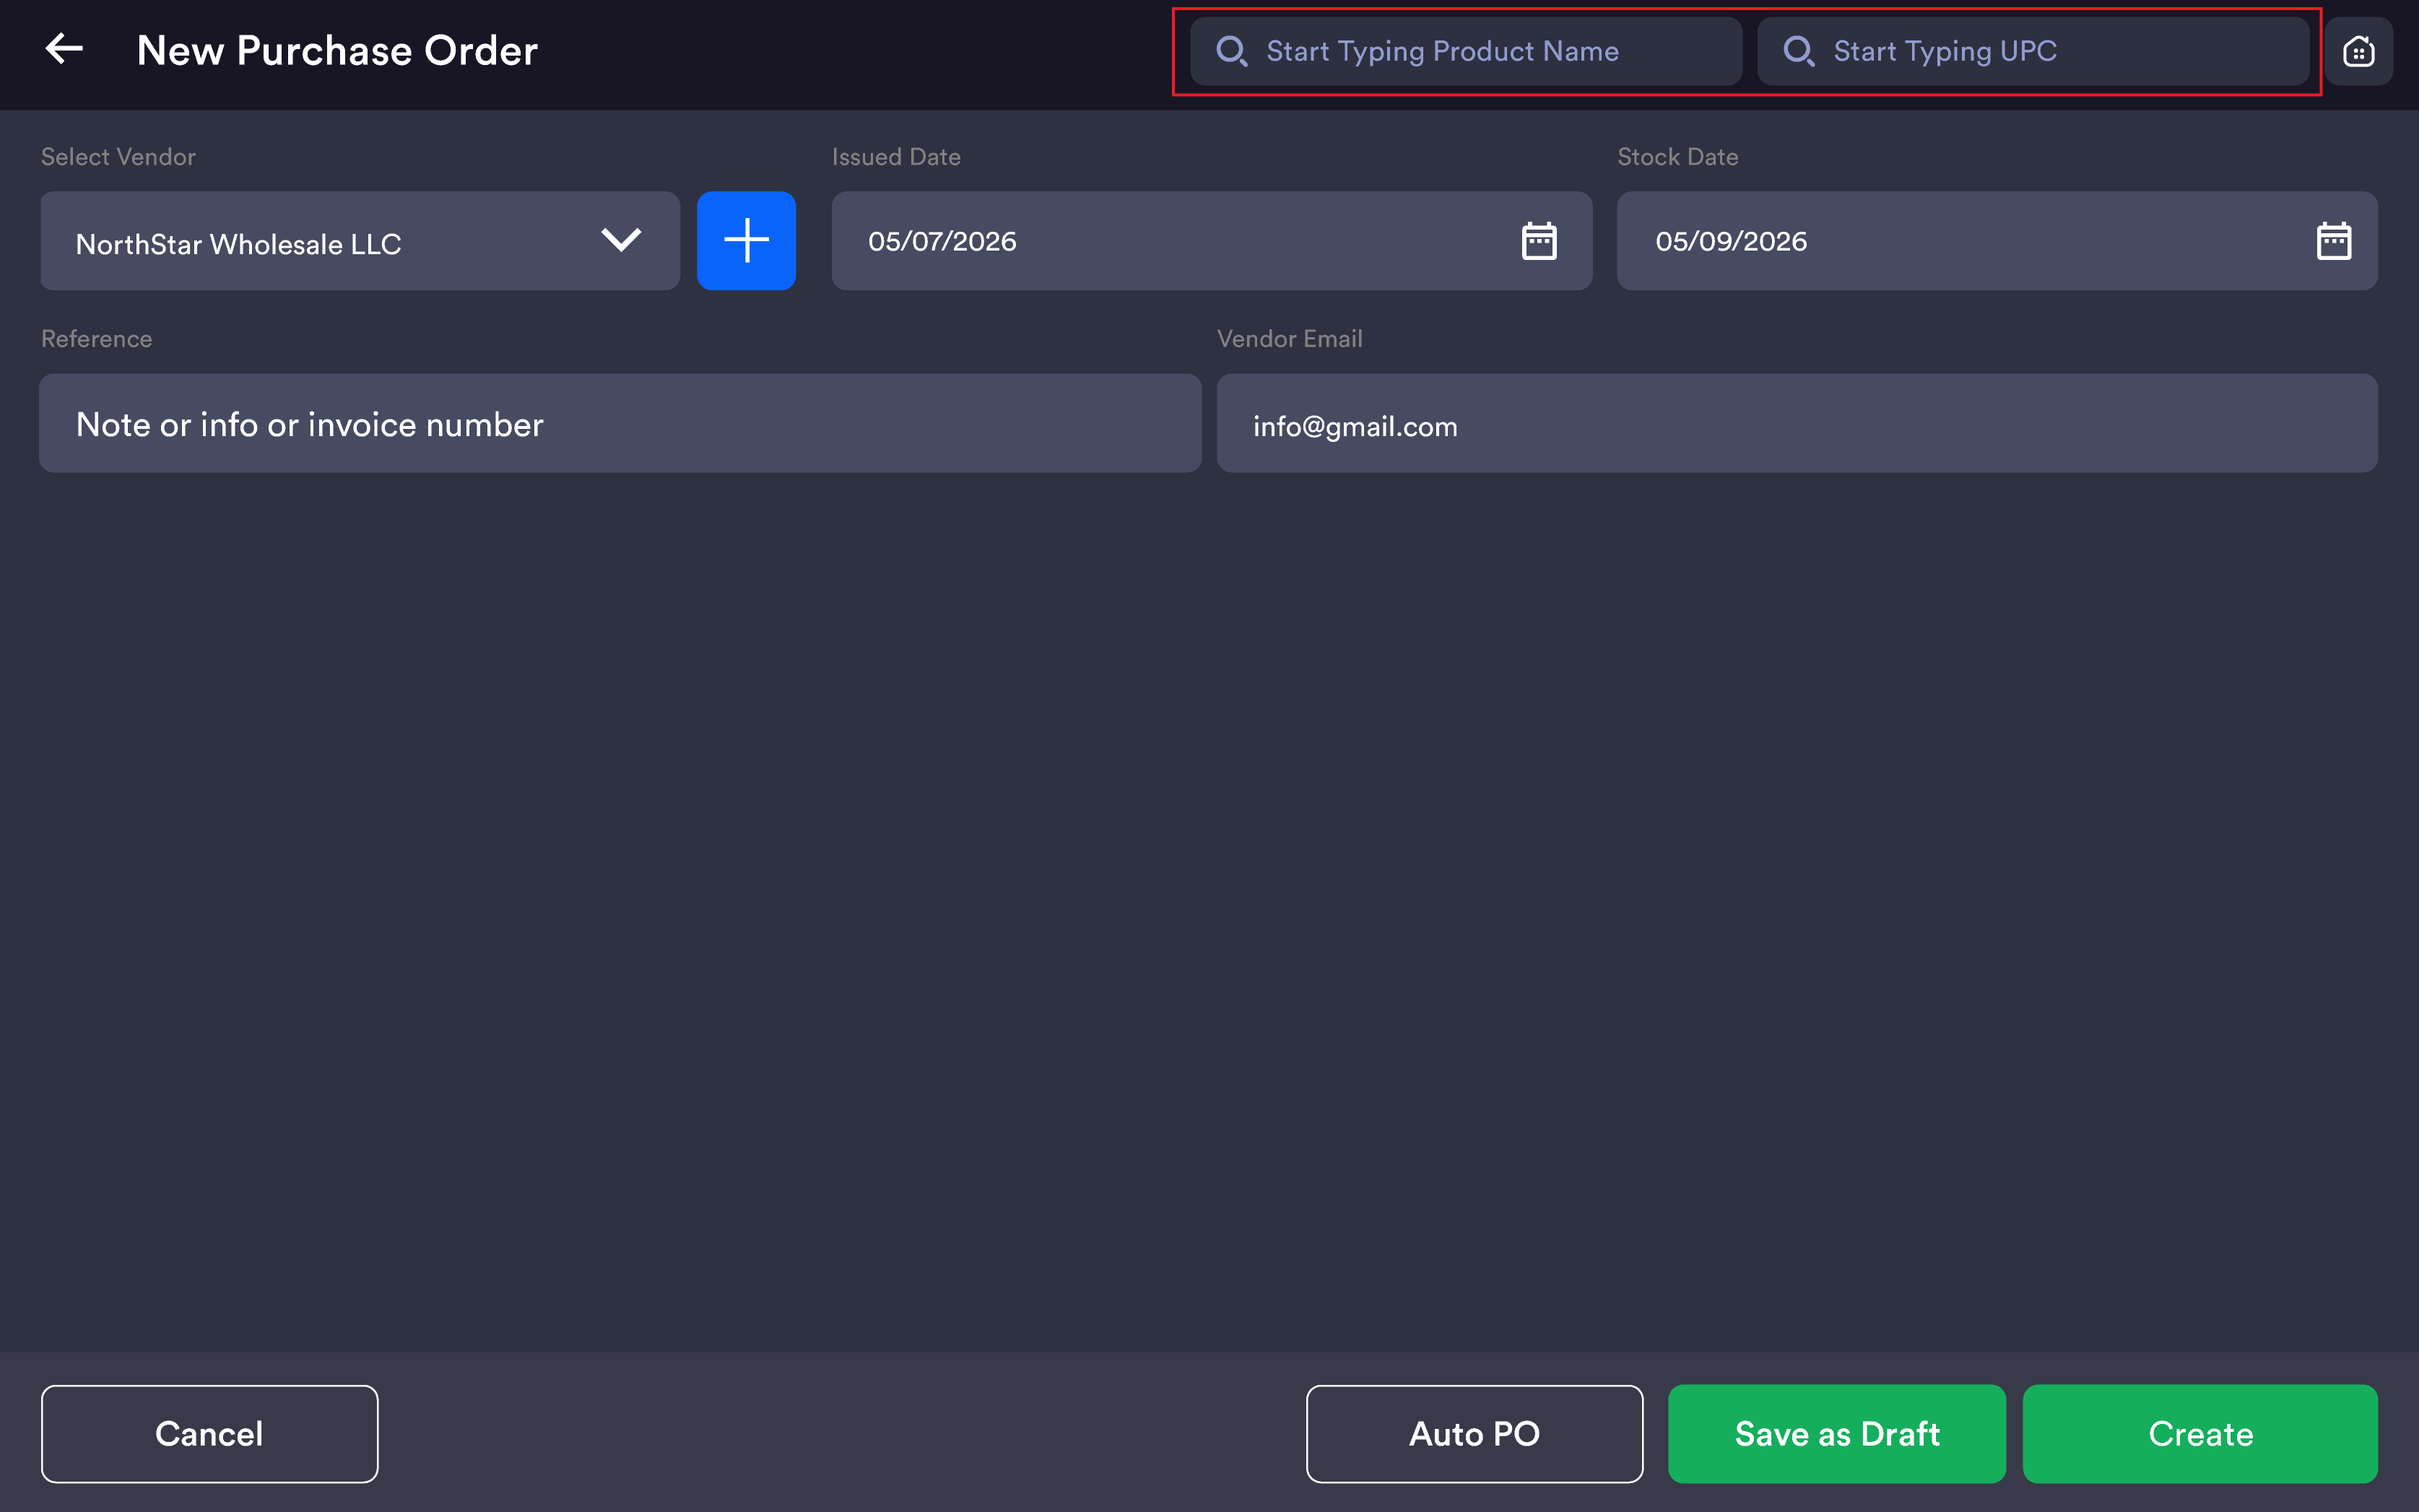
Step 2 — Add products
Search by Product Name — Tap the Start Typing Product Name field. As you type, matching products appear showing name, current stock quantity, and UPC.
Search by UPC — Tap the Start Typing UPC field and type or scan the barcode.
-20260527-112743.png?cb=c5a918f67942d90e67271548efeffb65)
Selecting multiple products — Tap the checkbox next to each product. When done, tap the back arrow (←) to add all selected products to the PO.
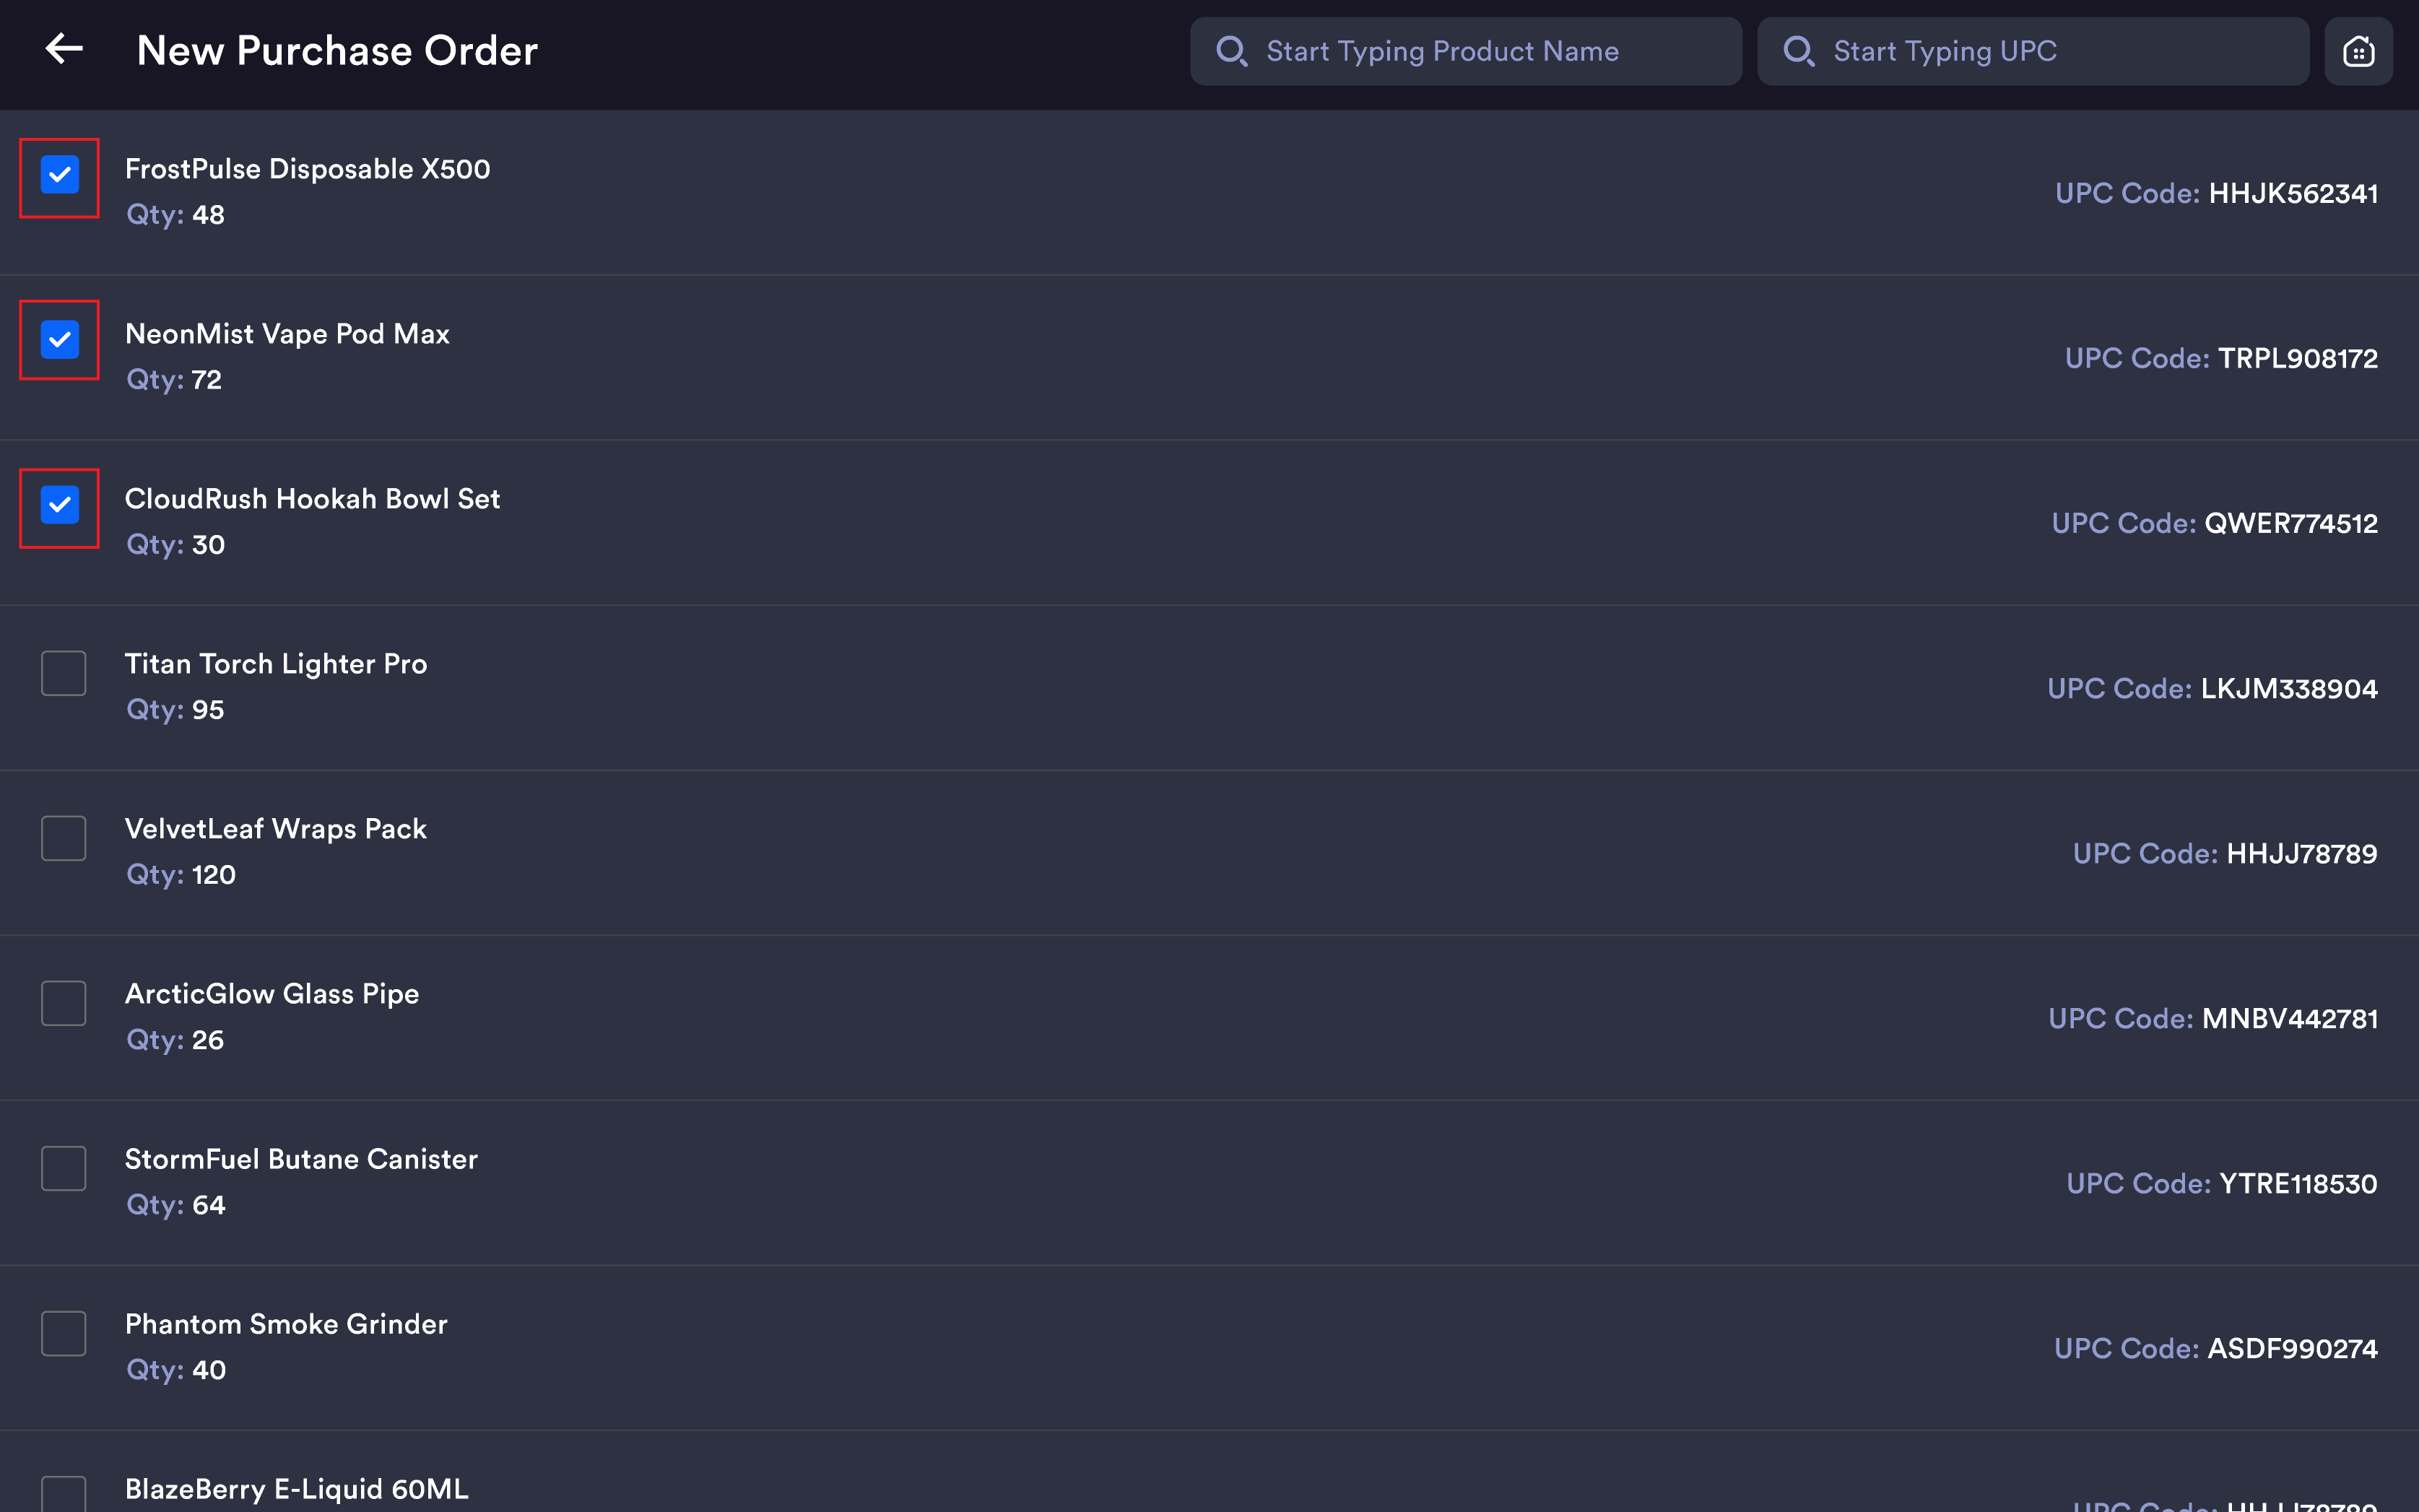
Note: Products with negative quantities (e.g. Qty: -32, Qty: -66) indicate oversold or unrecorded inventory. These are the highest priority items to restock via a PO.
Step 3 — Set quantities and costs
|
Column |
Description |
Editable? |
|---|---|---|
|
Item Name |
Product name from inventory |
No |
|
Qty |
Quantity being ordered |
Yes — tap to edit |
|
After |
Projected stock after receipt (Current Qty + Order Qty) |
No — auto-calculated |
|
Cost Per Unit |
Unit cost from vendor |
Yes — tap to edit |
|
Total |
Qty × Cost Per Unit |
No — auto-calculated |
|
UPC |
Product barcode |
No |
|
Add Note |
Blue link below product name — opens note modal per item |
Yes |
|
🗑 (Delete) |
Red trash icon — removes that line item from PO |
Yes |
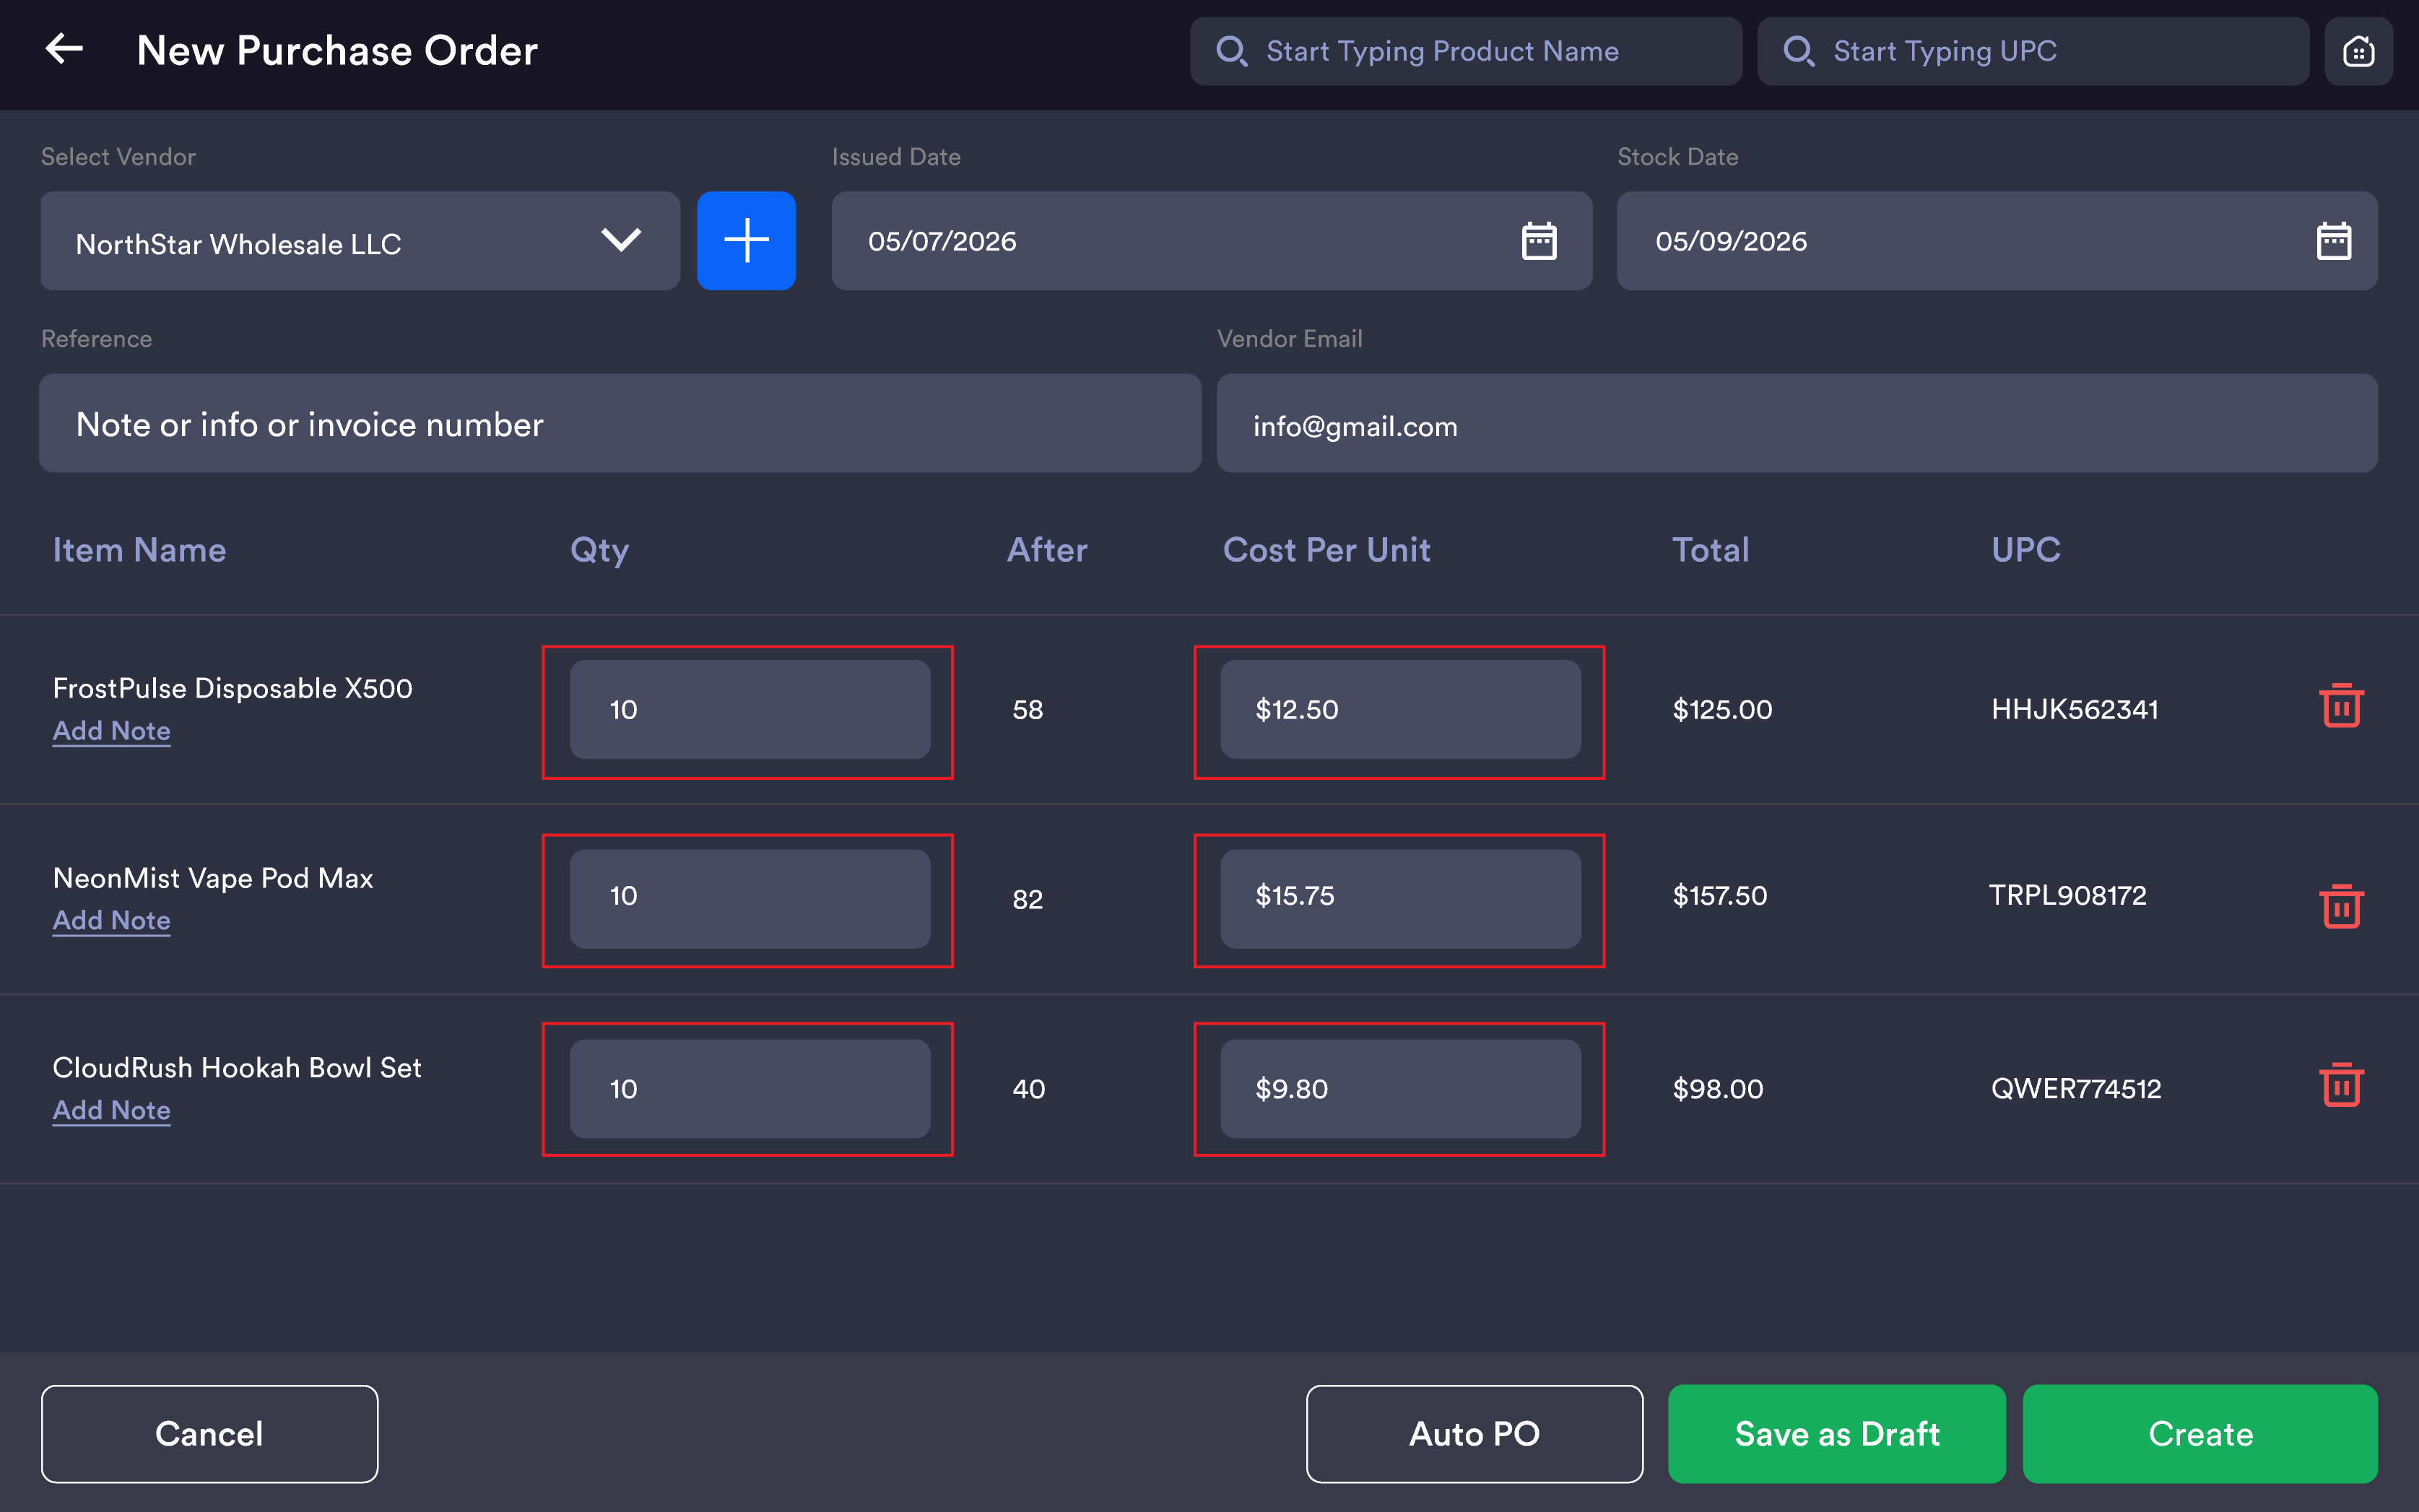
Note: The Qty field starts blank. The Total shows $0.00 until a quantity is entered. Cost Per Unit pre-fills with the last known cost — always verify before saving.
Step 4 — Add notes (optional)
Tap Add Note under any product to open the note modal with a title field. Tap Save to attach the note to that line item.
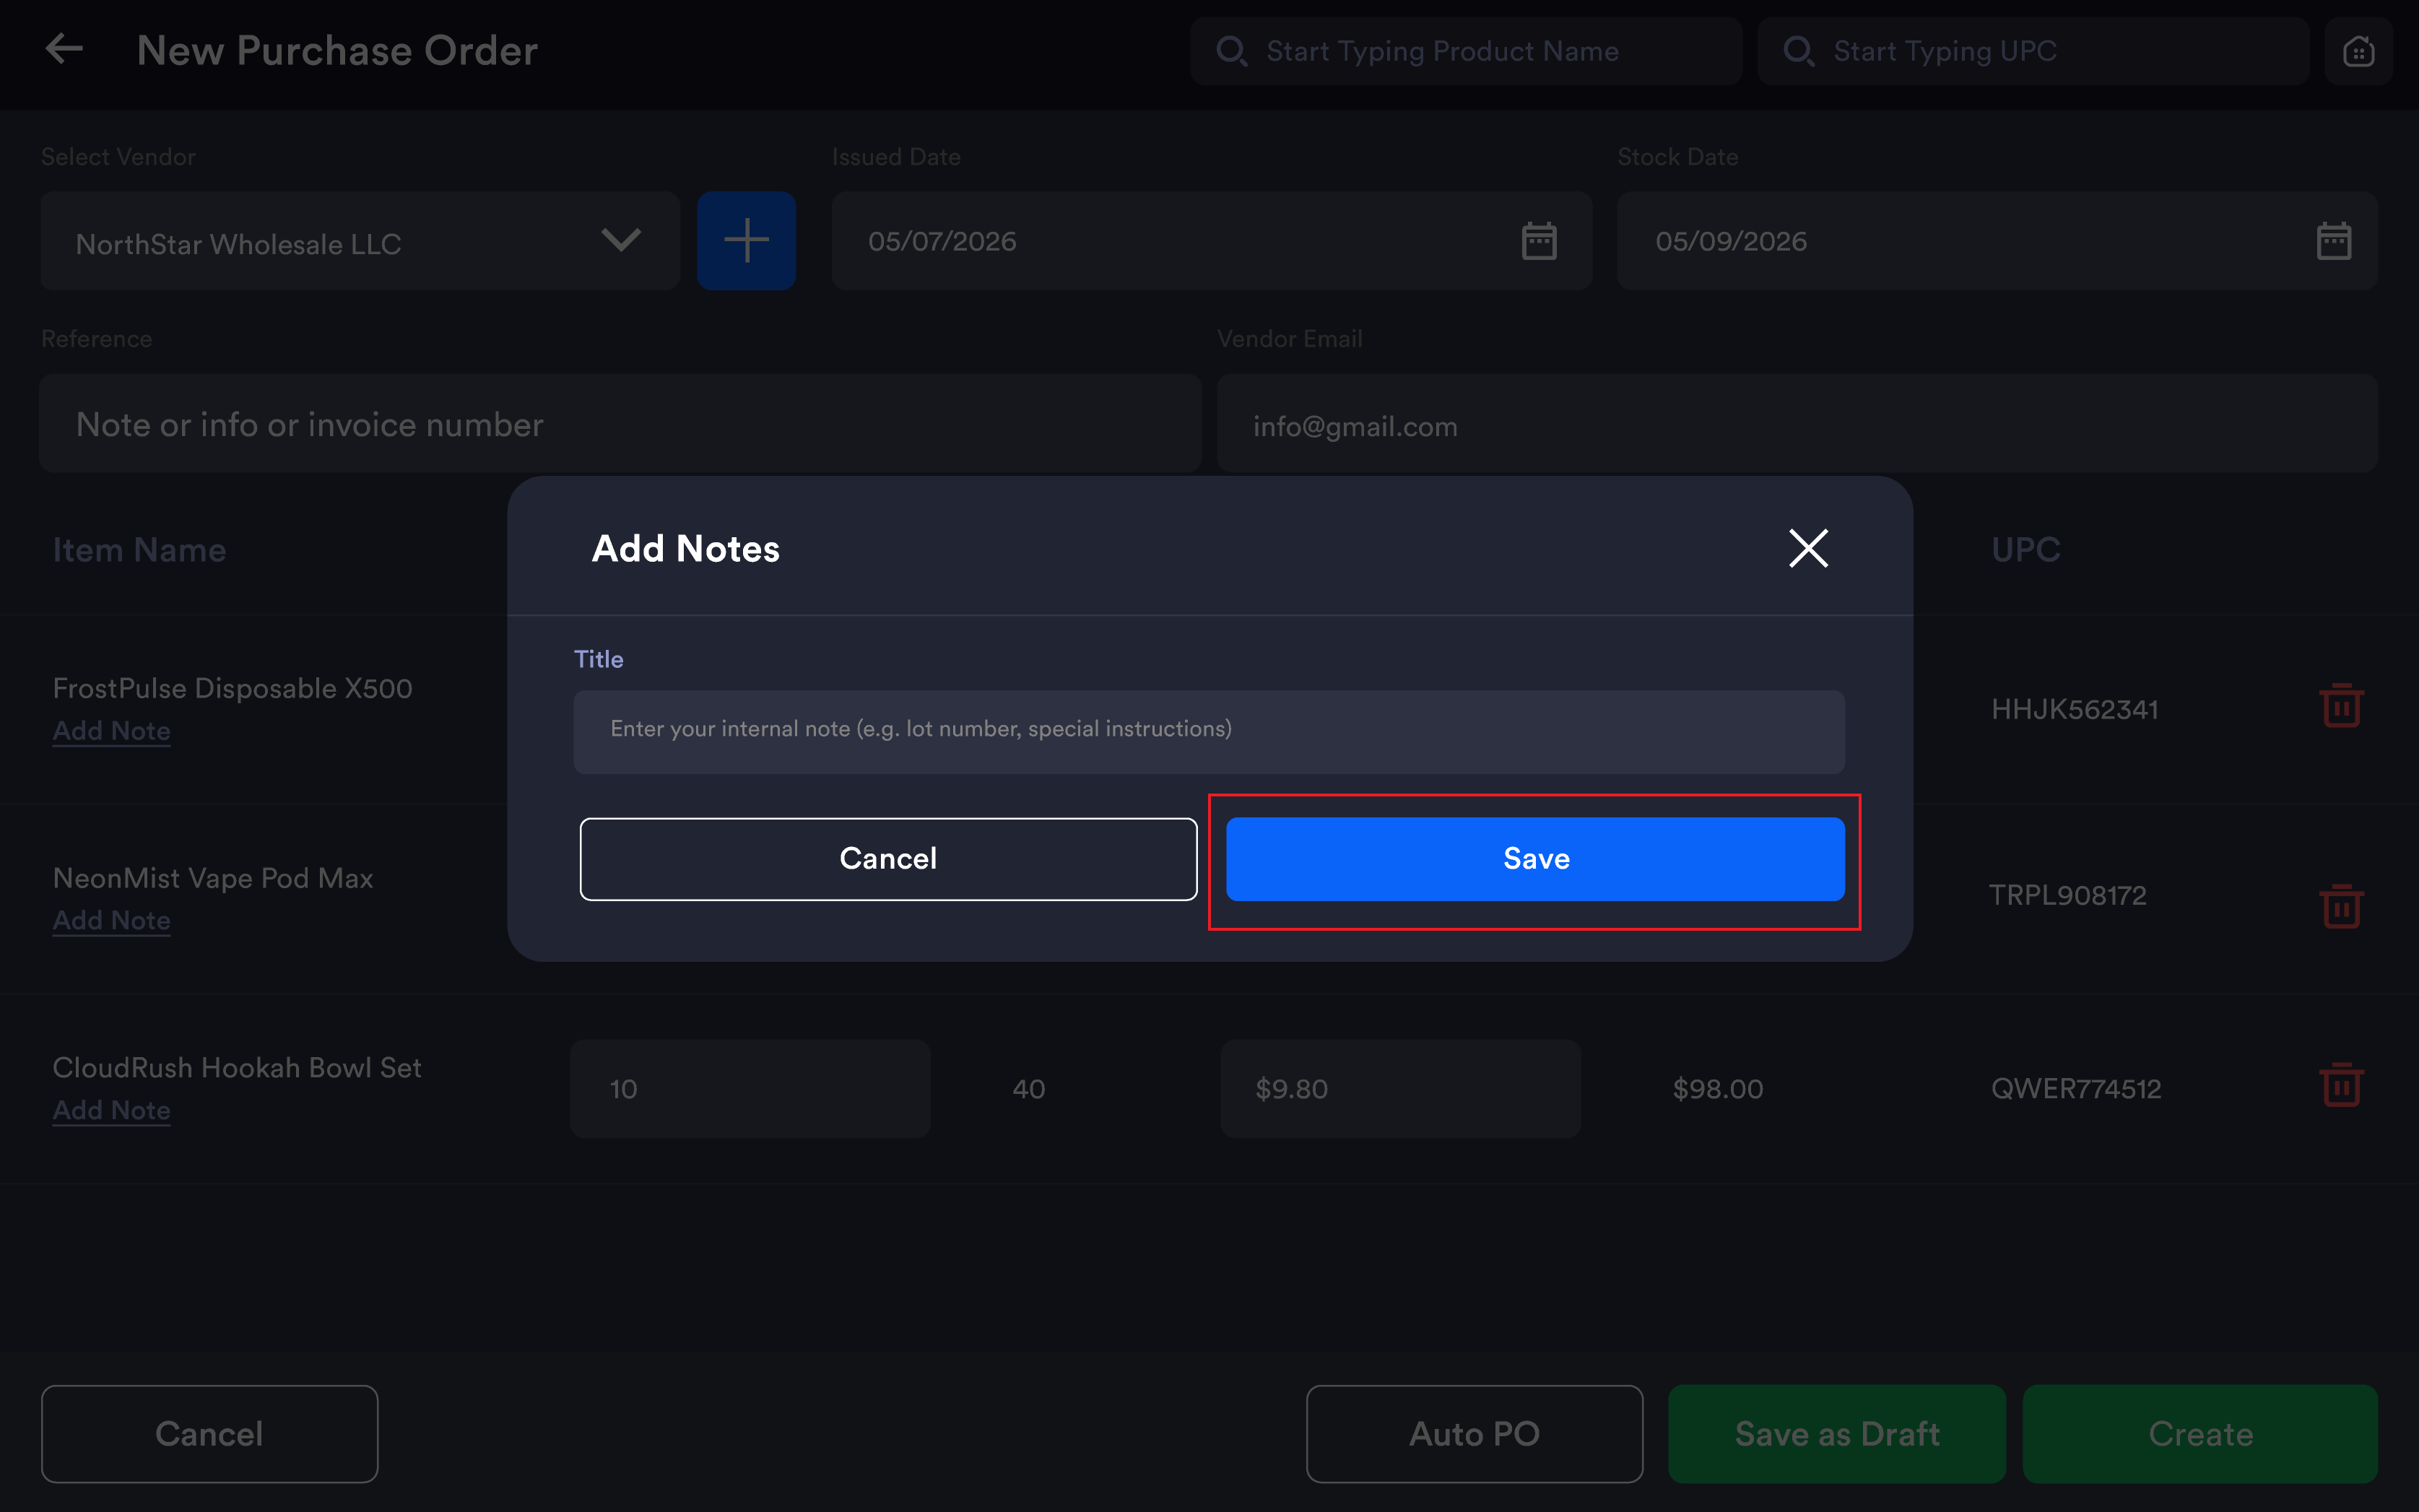
Note: Notes are for internal use only and do not appear on POs sent or printed for vendors.
Step 5 — Save or create
|
Button |
Resulting status |
What it does |
|---|---|---|
|
Cancel |
No PO saved |
Discards all entries; returns to PO list |
|
Auto PO |
Active |
Auto-generates PO based on reorder rules |
|
Save as Draft |
Draft |
Saves without activating; no inventory impact; fully editable later |
|
Create |
Active |
Activates the PO; ready for receiving |
Note: A Draft PO has zero impact on inventory. Inventory is only updated when goods are received against an Active PO.
PO statuses
|
Status |
Meaning |
Received indicator |
|---|---|---|
|
Draft |
Saved but not activated |
Empty circle |
|
Active |
Created and awaiting receipt of goods |
Empty circle |
|
Partial |
Some items received; remainder still outstanding |
Half-filled circle |
|
Received |
All items received; inventory updated |
Filled circle |
Receiving a Purchase Order
Tap any Active PO row in the list to open the PO detail view. The detail view header shows the vendor name, Active status, PO number, and Issued Date.
|
Column |
Description |
Editable? |
|---|---|---|
|
Item Name |
Product name + variant |
No |
|
Qty |
Total quantity ordered |
No |
|
To Receive |
Quantity to receive now |
Yes — edit for partial receipt |
|
After |
Projected stock after receiving |
No |
|
Cost Per Unit |
Unit cost set on PO |
No |
|
Total |
Line total |
No |
|
UPC |
Product barcode |
No |
Checkboxes: All items are checked by default. Uncheck any item to exclude it from this receiving action.
|
Button |
Action |
|---|---|
|
|
Prints the PO document |
|
Edit PO |
Re-opens the PO for editing quantities, costs, or products |
|
Void |
Cancels the PO without receiving; no inventory impact |
|
Receive all |
Receives all checked items at their To Receive quantity; updates inventory; sets status to Received or Partial |
Important: Once a PO is fully Received, it cannot be edited or voided. It becomes a permanent inventory receipt record. Always verify quantities before tapping Receive all.
Partial receiving
If you receive fewer units than ordered on a line item:
-
Tap the To Receive field for that item
-
Change the quantity to the actual amount received
-
Tap Receive all
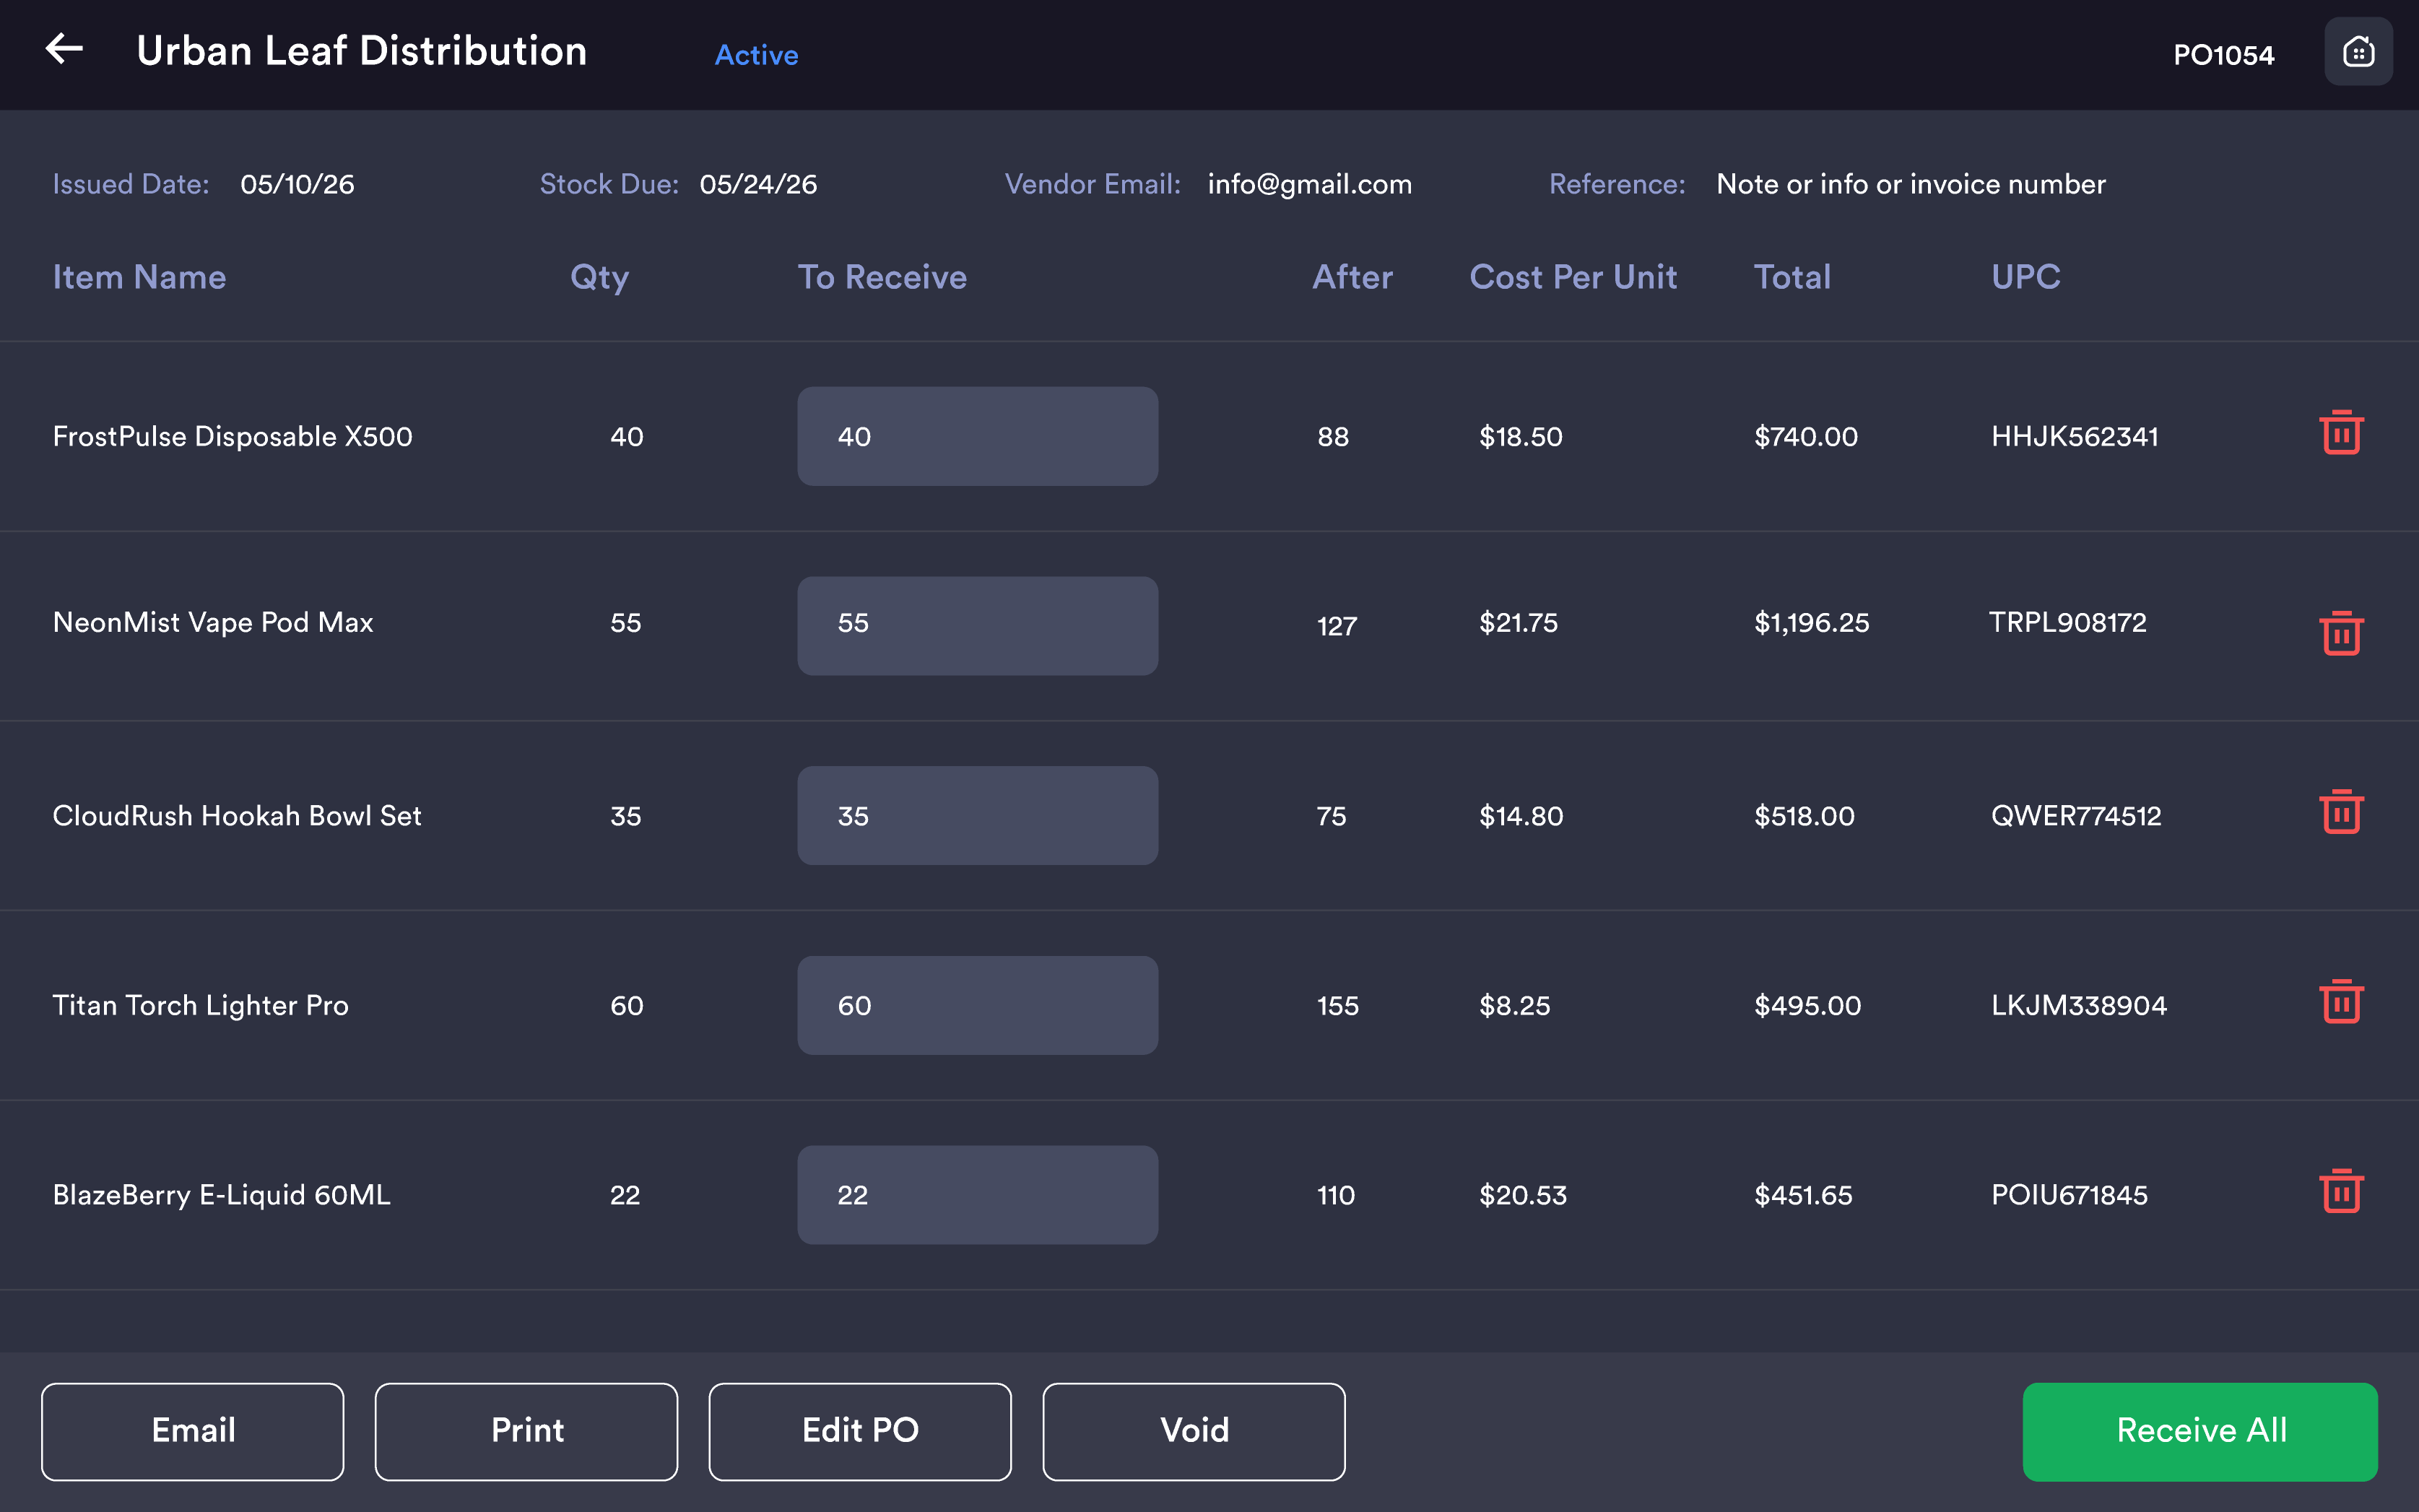
The PO status will change to Partial. The remaining quantity stays outstanding and can be received later.
Editing a Draft PO
-
Tap the Draft PO in the list
-
Tap Edit PO
-
Modify quantities, costs, products, or vendor details
-
Tap Save as Draft to keep as draft, or Create to activate
Important notes
Negative inventory quantities (e.g. -32, -41, -66) mean inventory has been sold beyond recorded stock. Use POs to correct these immediately.
Vendor field is optional. Best practice is to always assign a vendor for accurate reporting.
Lottery products are included in Purchase Orders just like all other product types.
UPC column is included in both printed POs and emailed PO templates to help with product identification during receiving.