
The Customers module in Quickvee POS lets merchants manage their full customer database directly from the POS tablet. Create new customers, view and edit profiles, manage loyalty points and store credit, view order history, add notes, disable profiles, and merge duplicate accounts — all from one place.
Accessing the Customers module
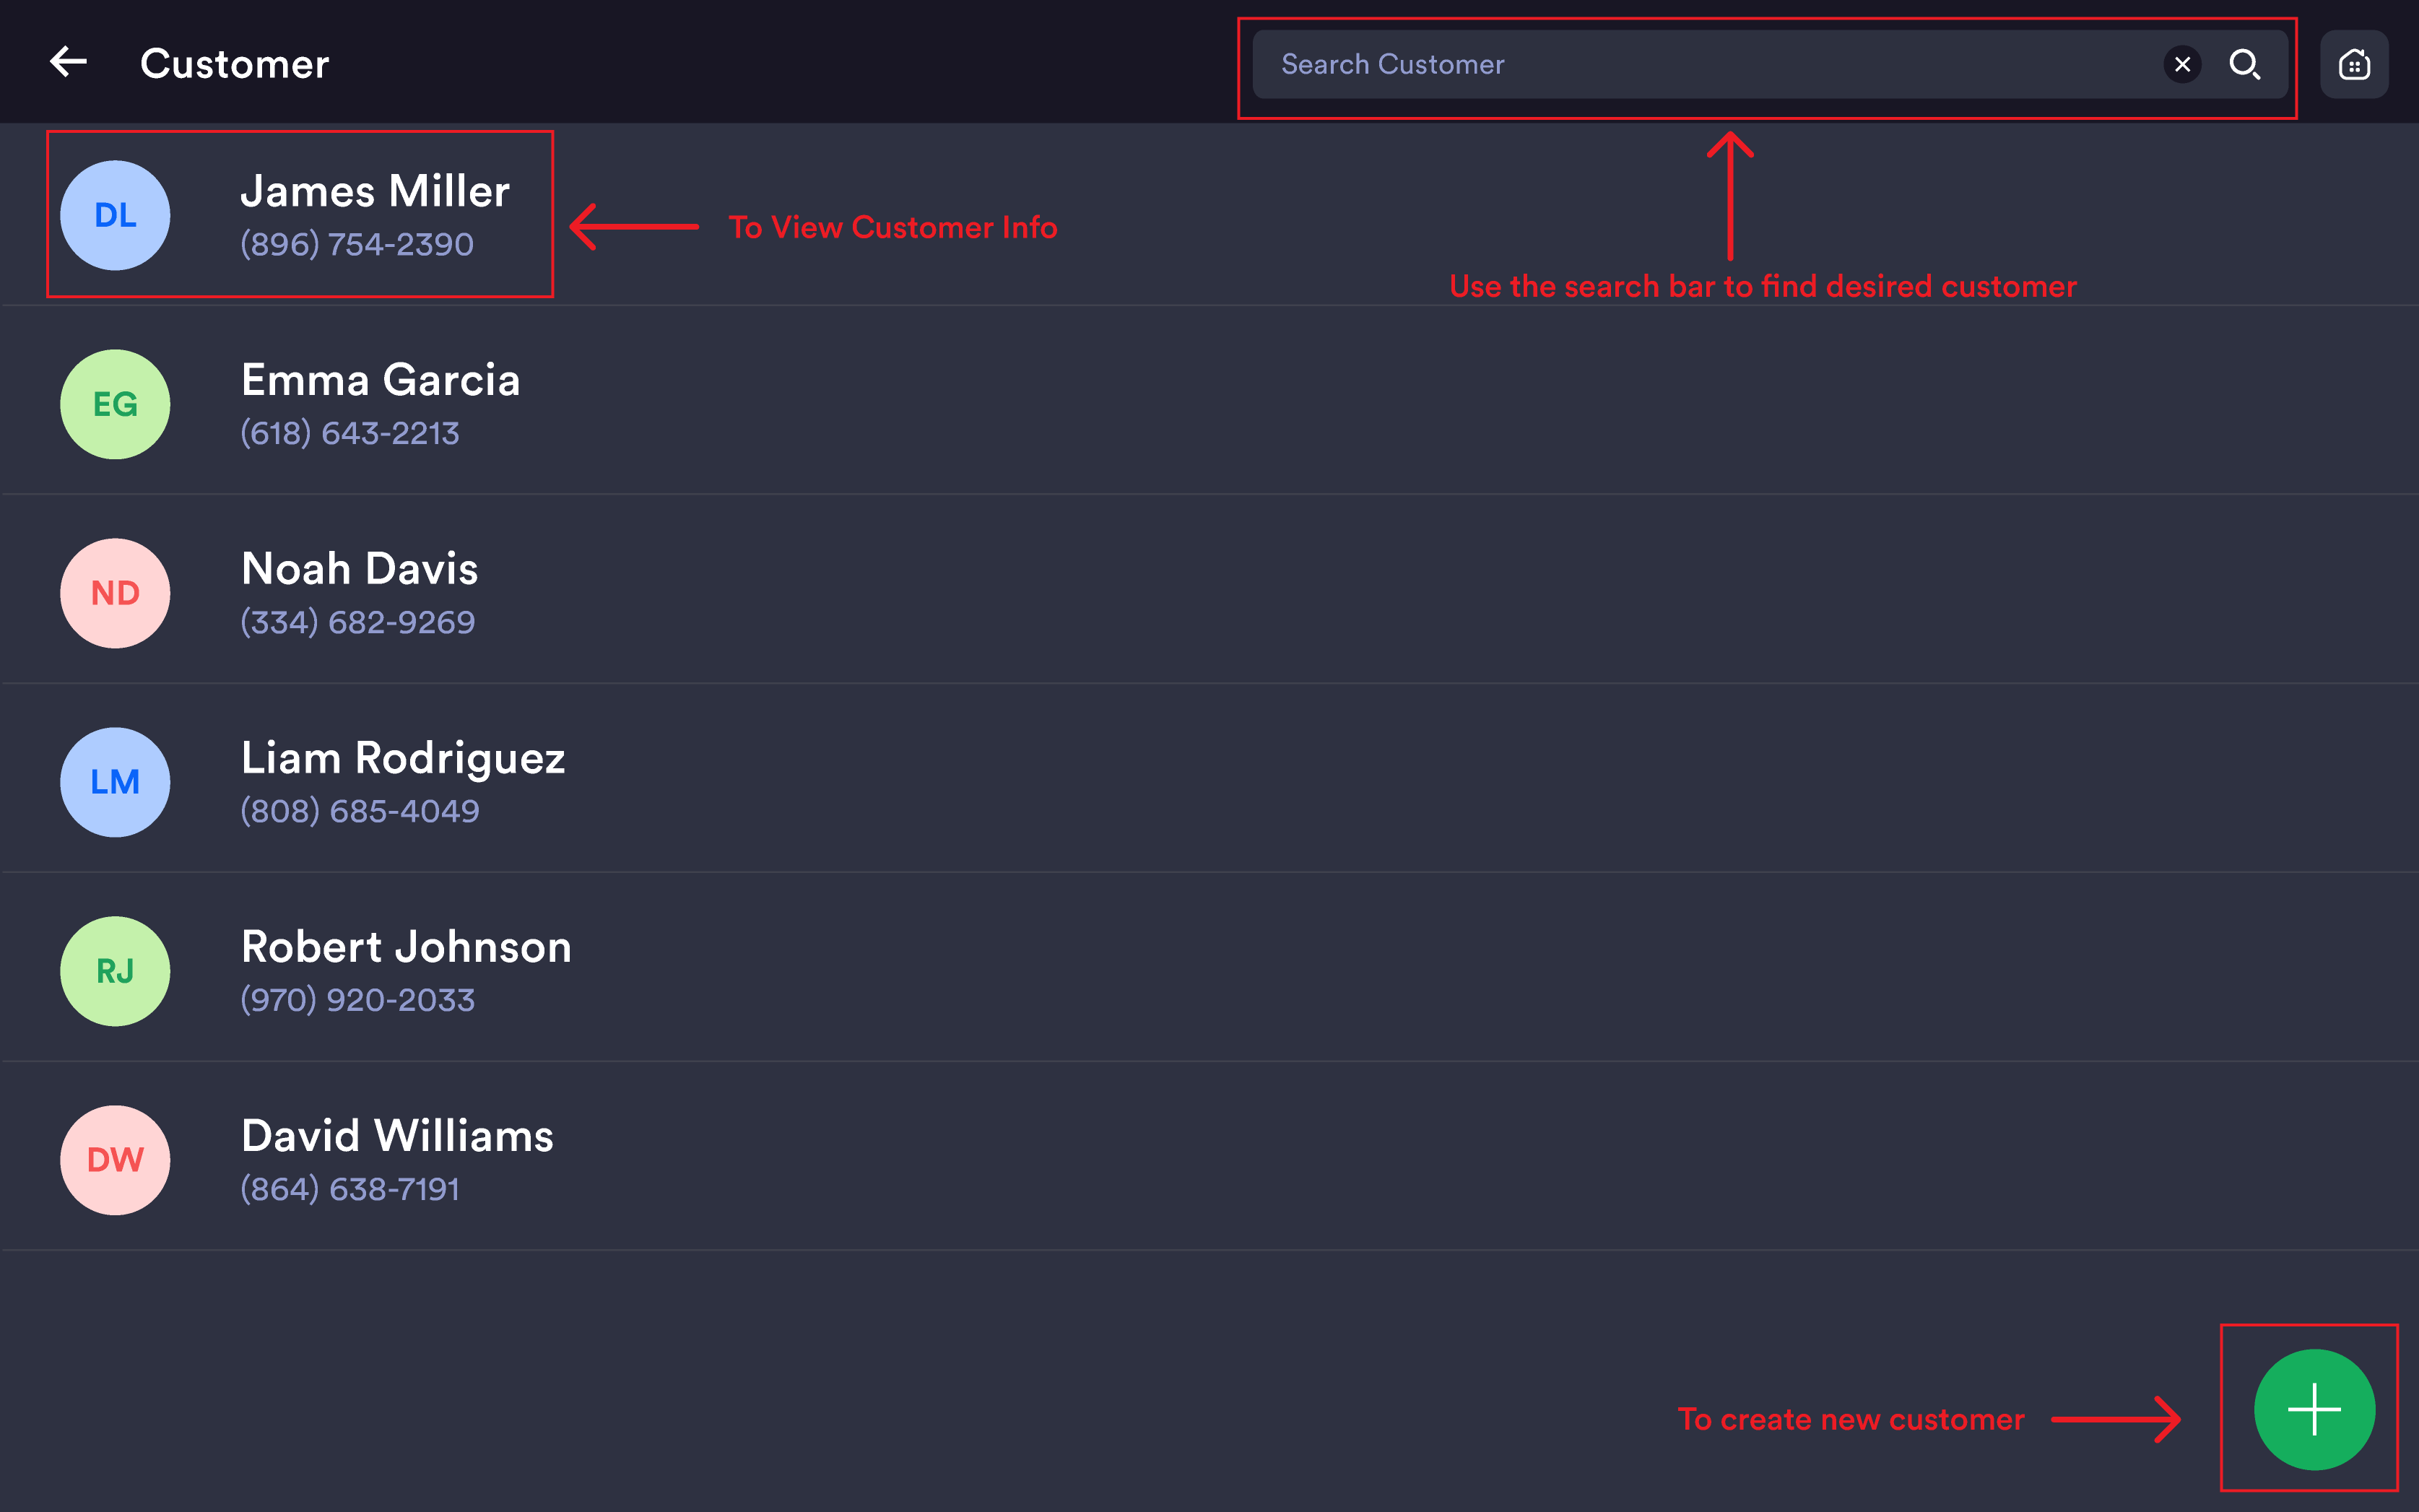
From the POS home screen, tap Customers. The customer list appears showing all registered customers with name, initials avatar, and phone number.
Searching for a customer: use the search bar at the top to search by phone number, name, or email. Tap any customer to open their Customer Info profile.
Customer profile overview
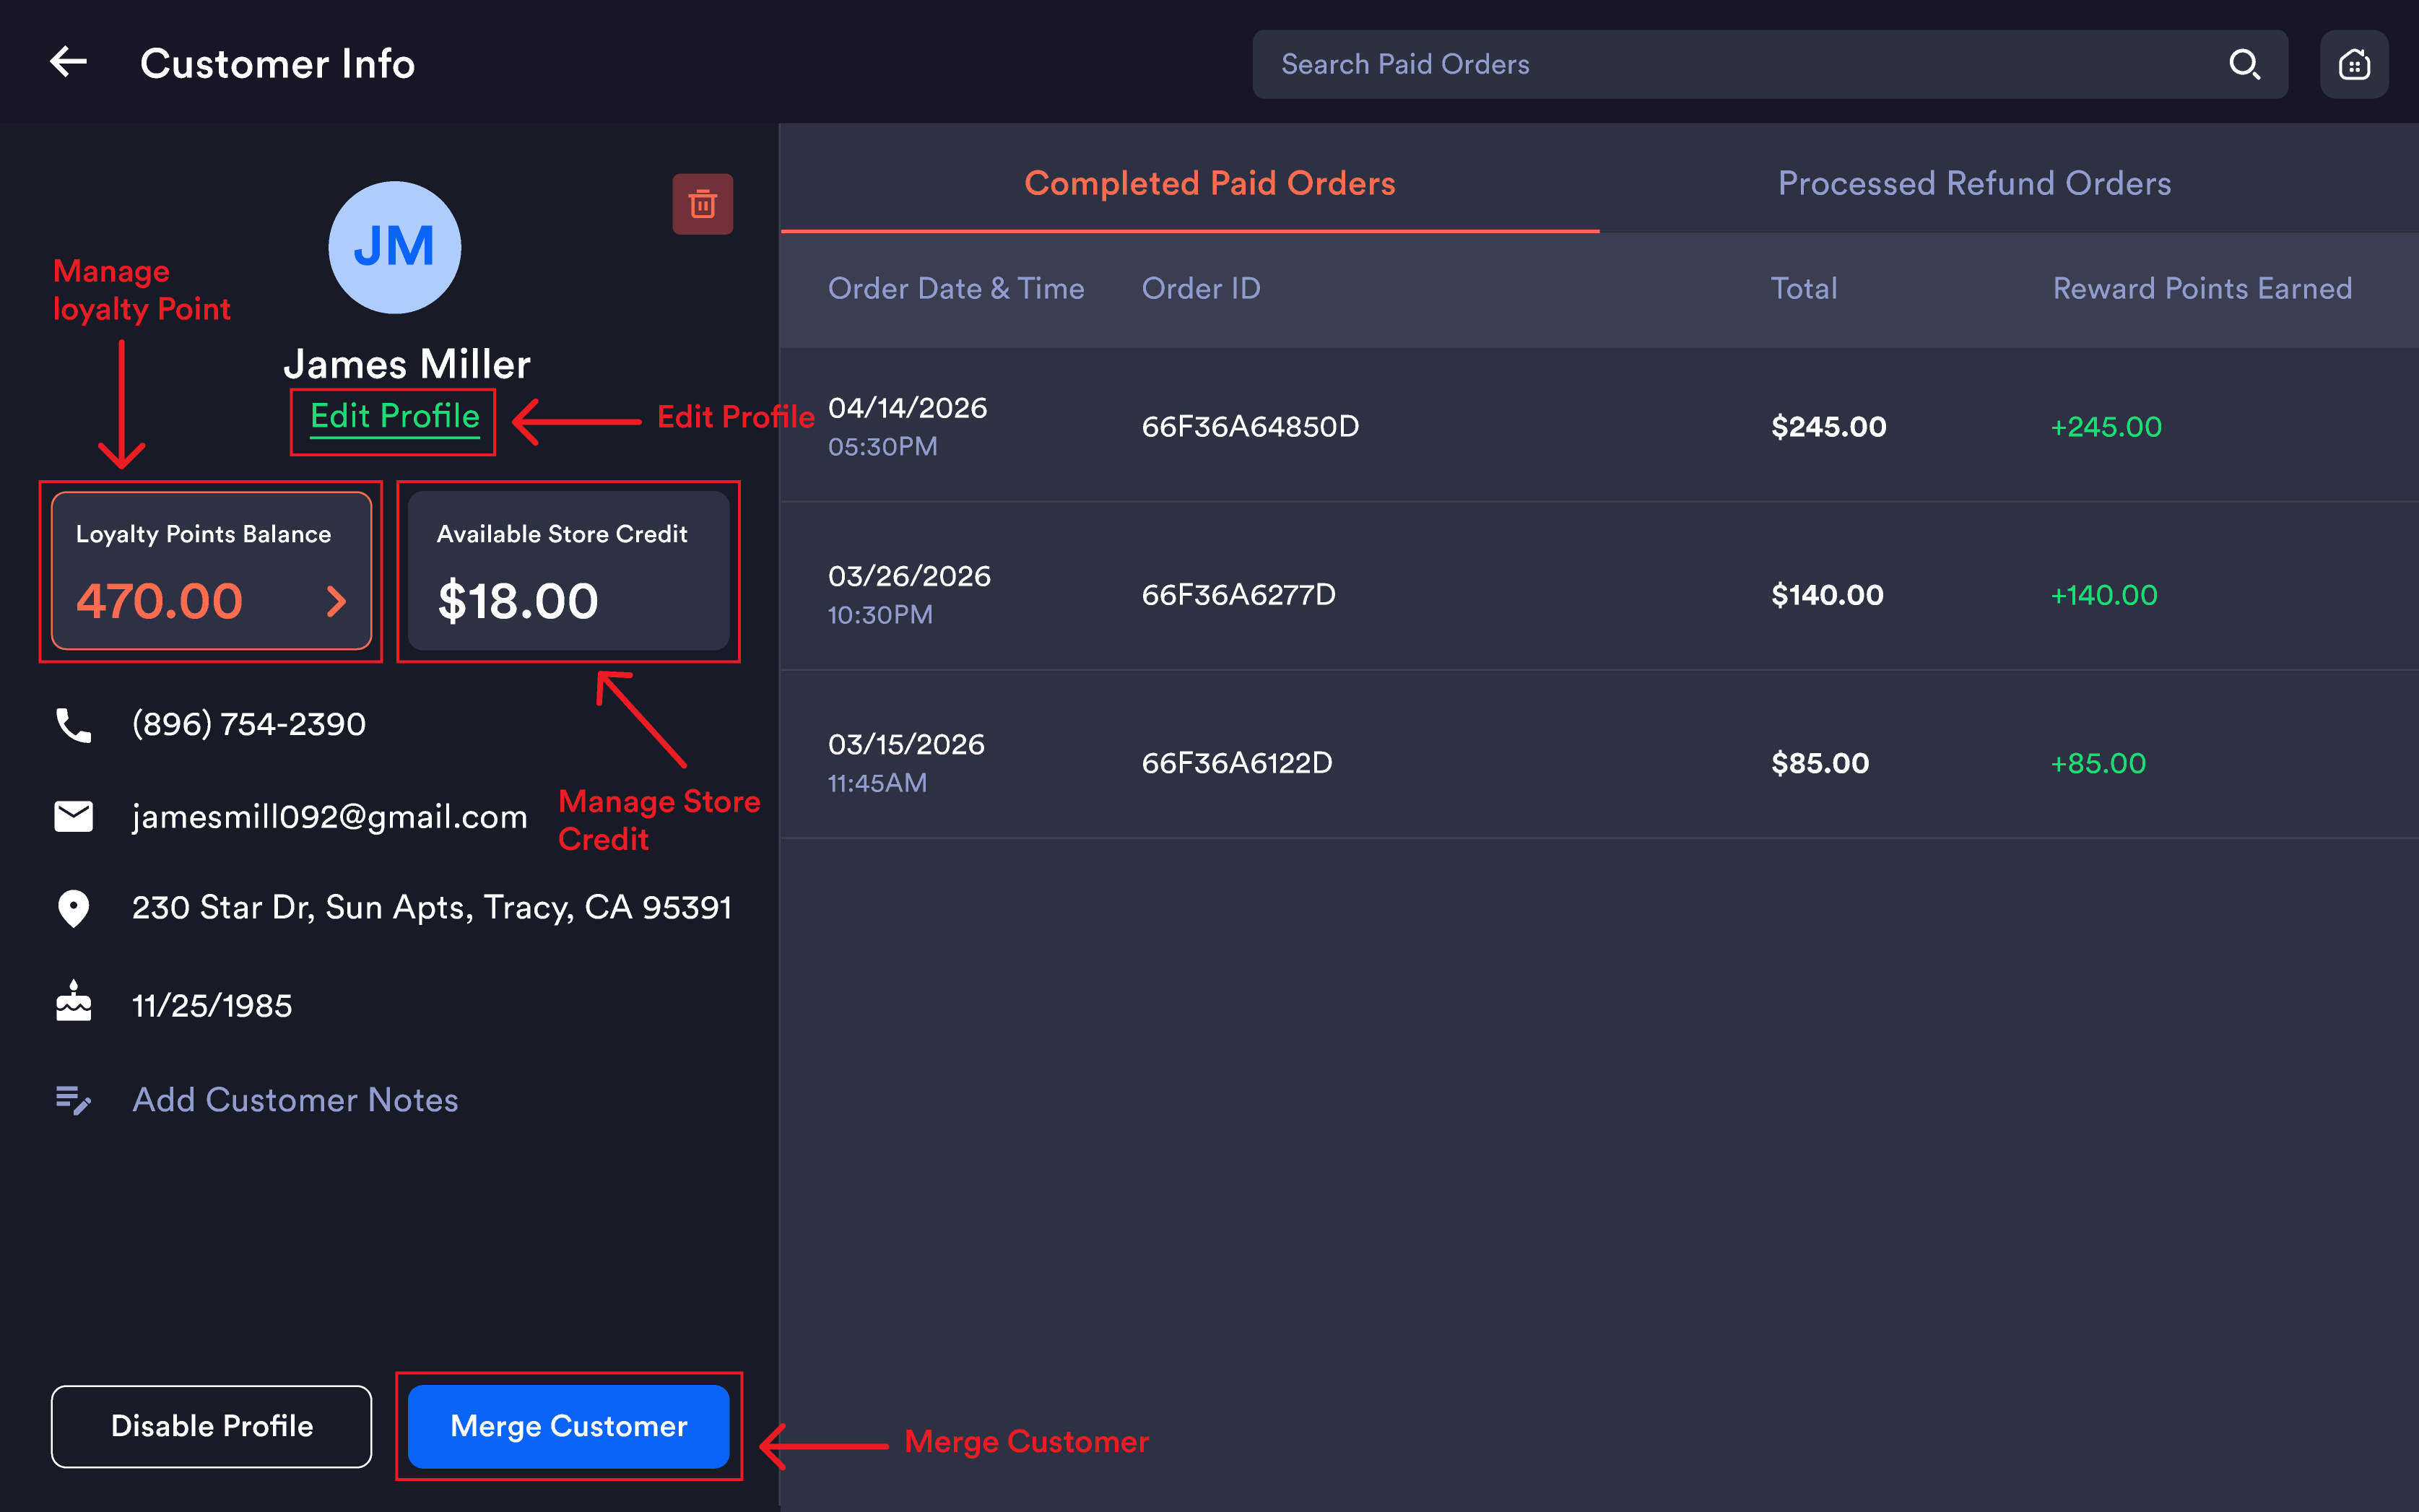
Left panel — Customer details:
-
Avatar with initials
-
Full name with Edit Profile link
-
Loyalty Points Balance (tap to manage)
-
Available Store Credit (tap to manage)
-
Phone number, Email, Address, Date of birth, Customer notes
Right panel — Order history:
-
Completed Paid Orders tab — Order Date & Time, Order ID, Total, Reward Points Earned
-
Processed Refund Orders tab — all refund transactions
Bottom action buttons: Disable Profile and Merge Customer.
Creating a new customer
From the Customer list: tap the + green button (bottom-right) to open the Create New Customer popup.
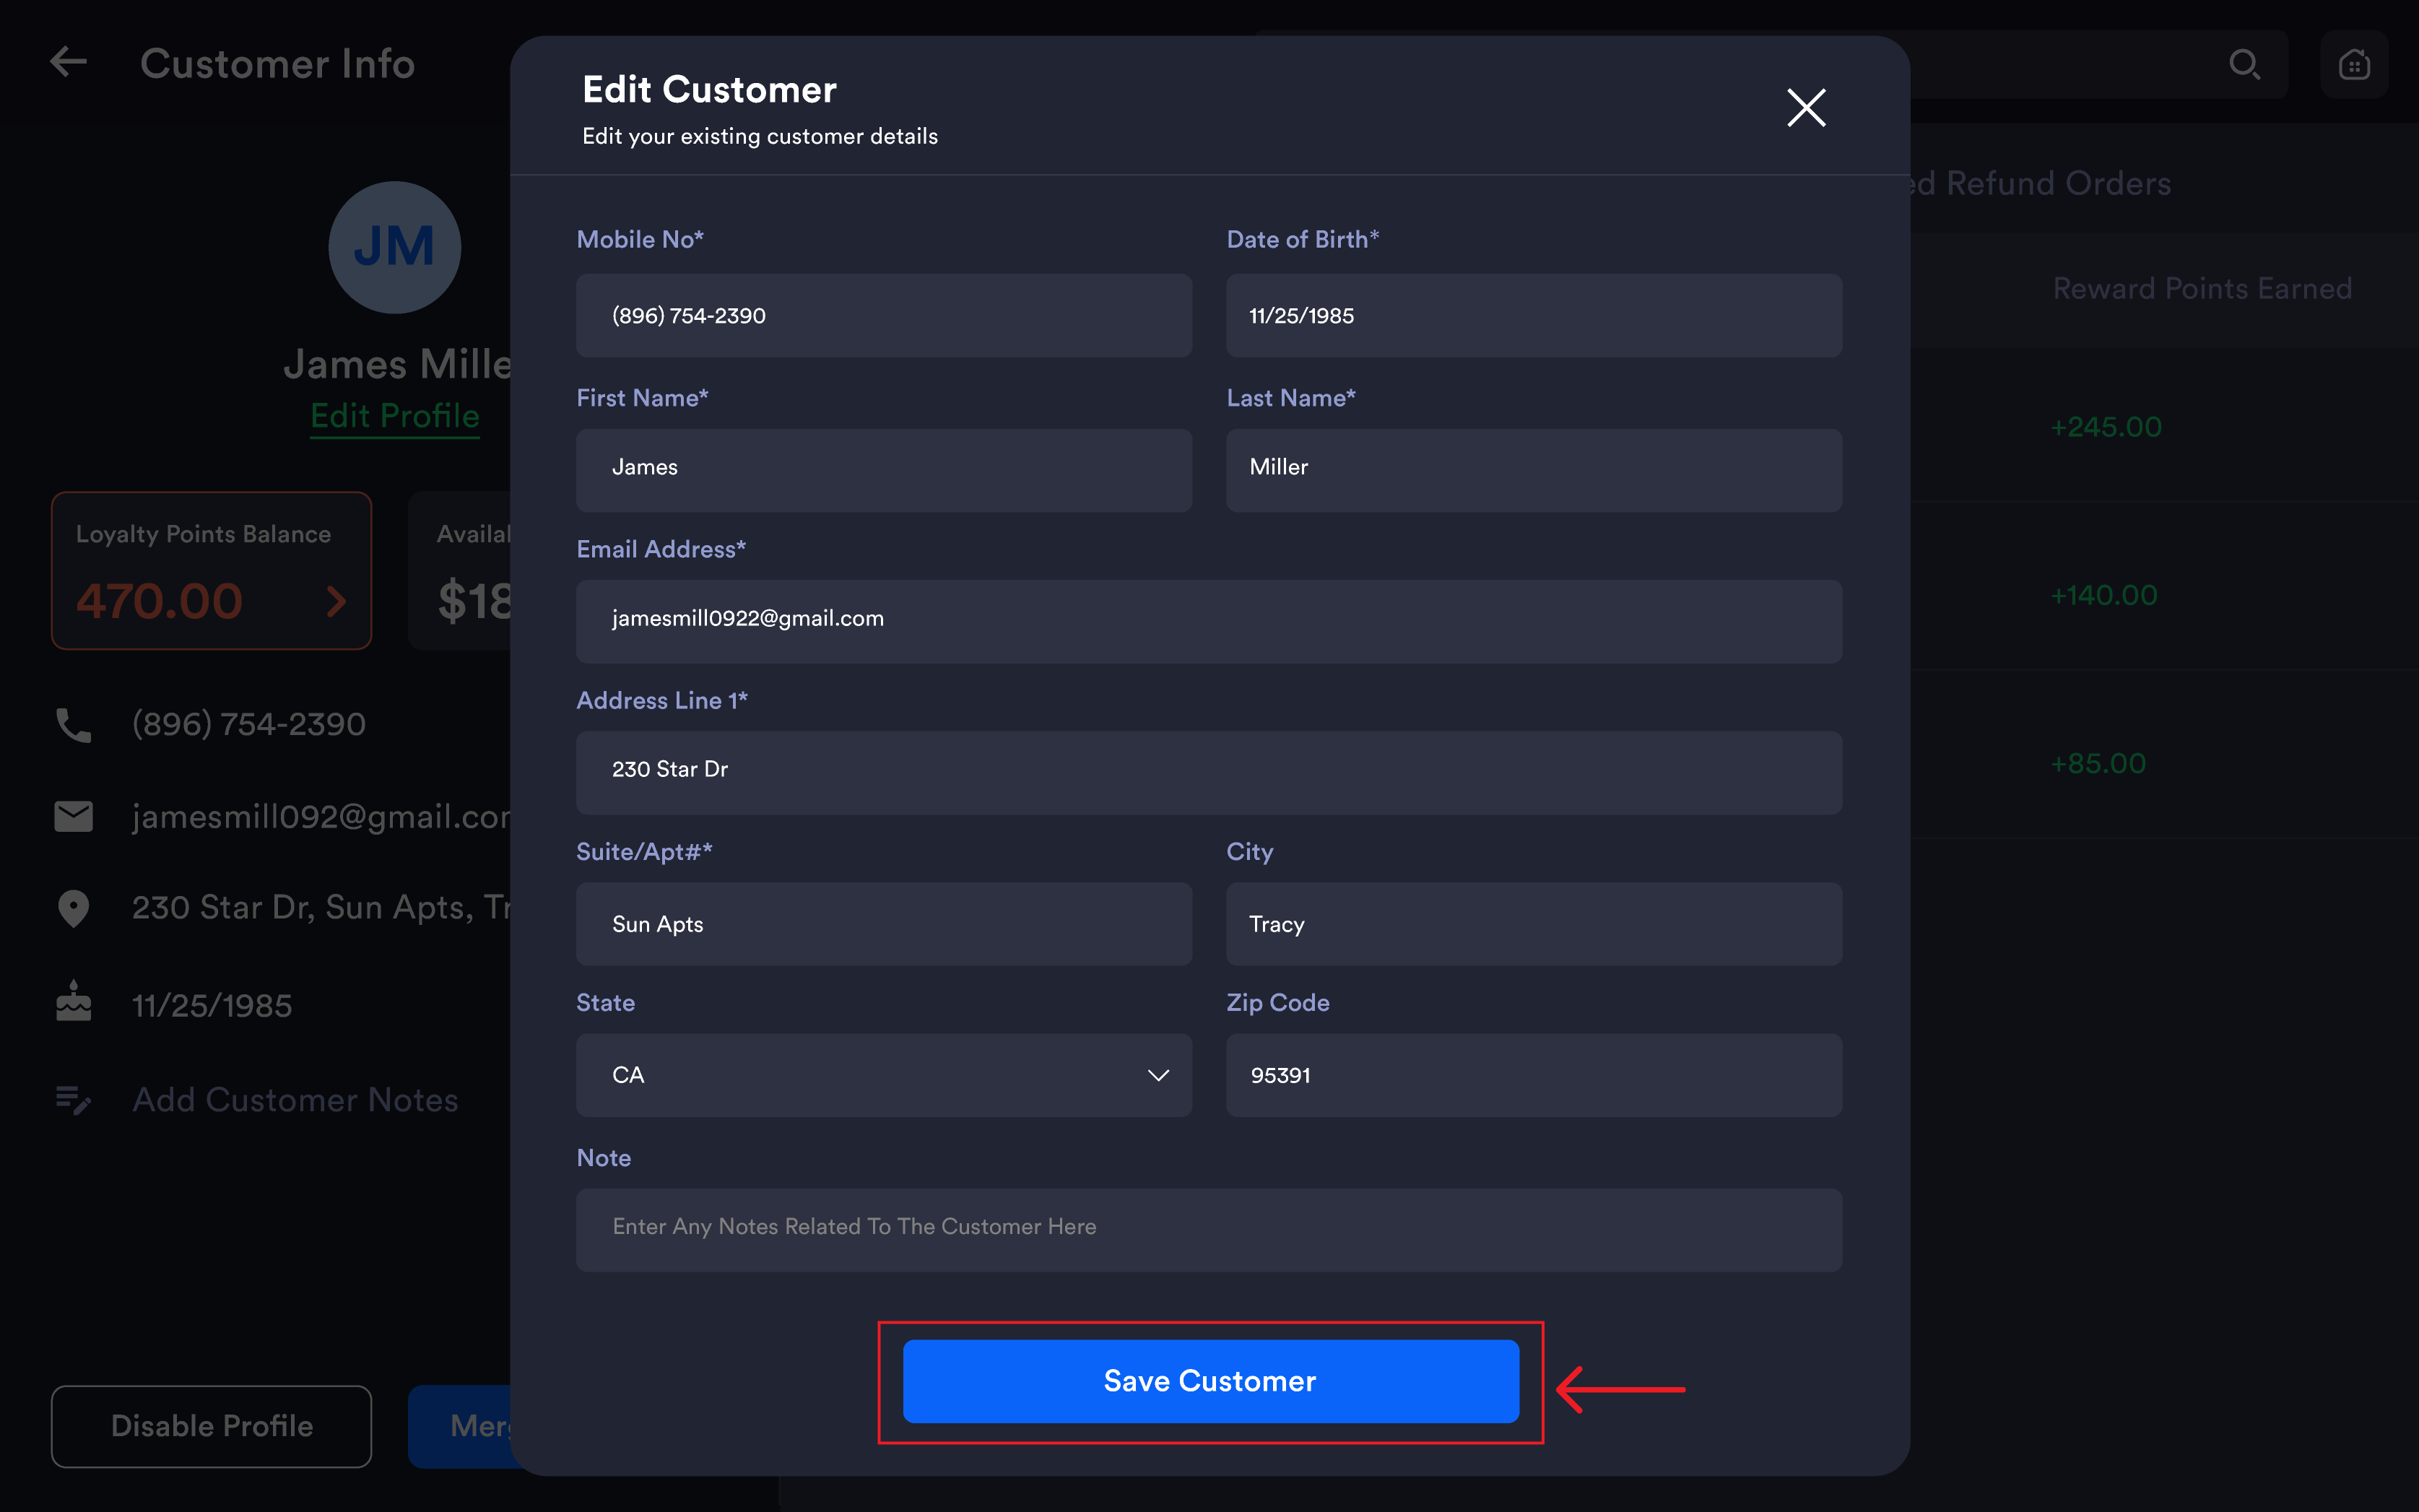
From a Customer profile: tap Edit Profile — the same form opens pre-filled.
|
Field |
Required |
|---|---|
|
Mobile No |
✅ Required |
|
First Name |
✅ Required |
|
Email Address |
✅ Required |
|
Last Name |
Optional |
|
Date of Birth |
Optional |
|
Address Line 1, Suite/Apt#, City, State, Zip Code |
Optional |
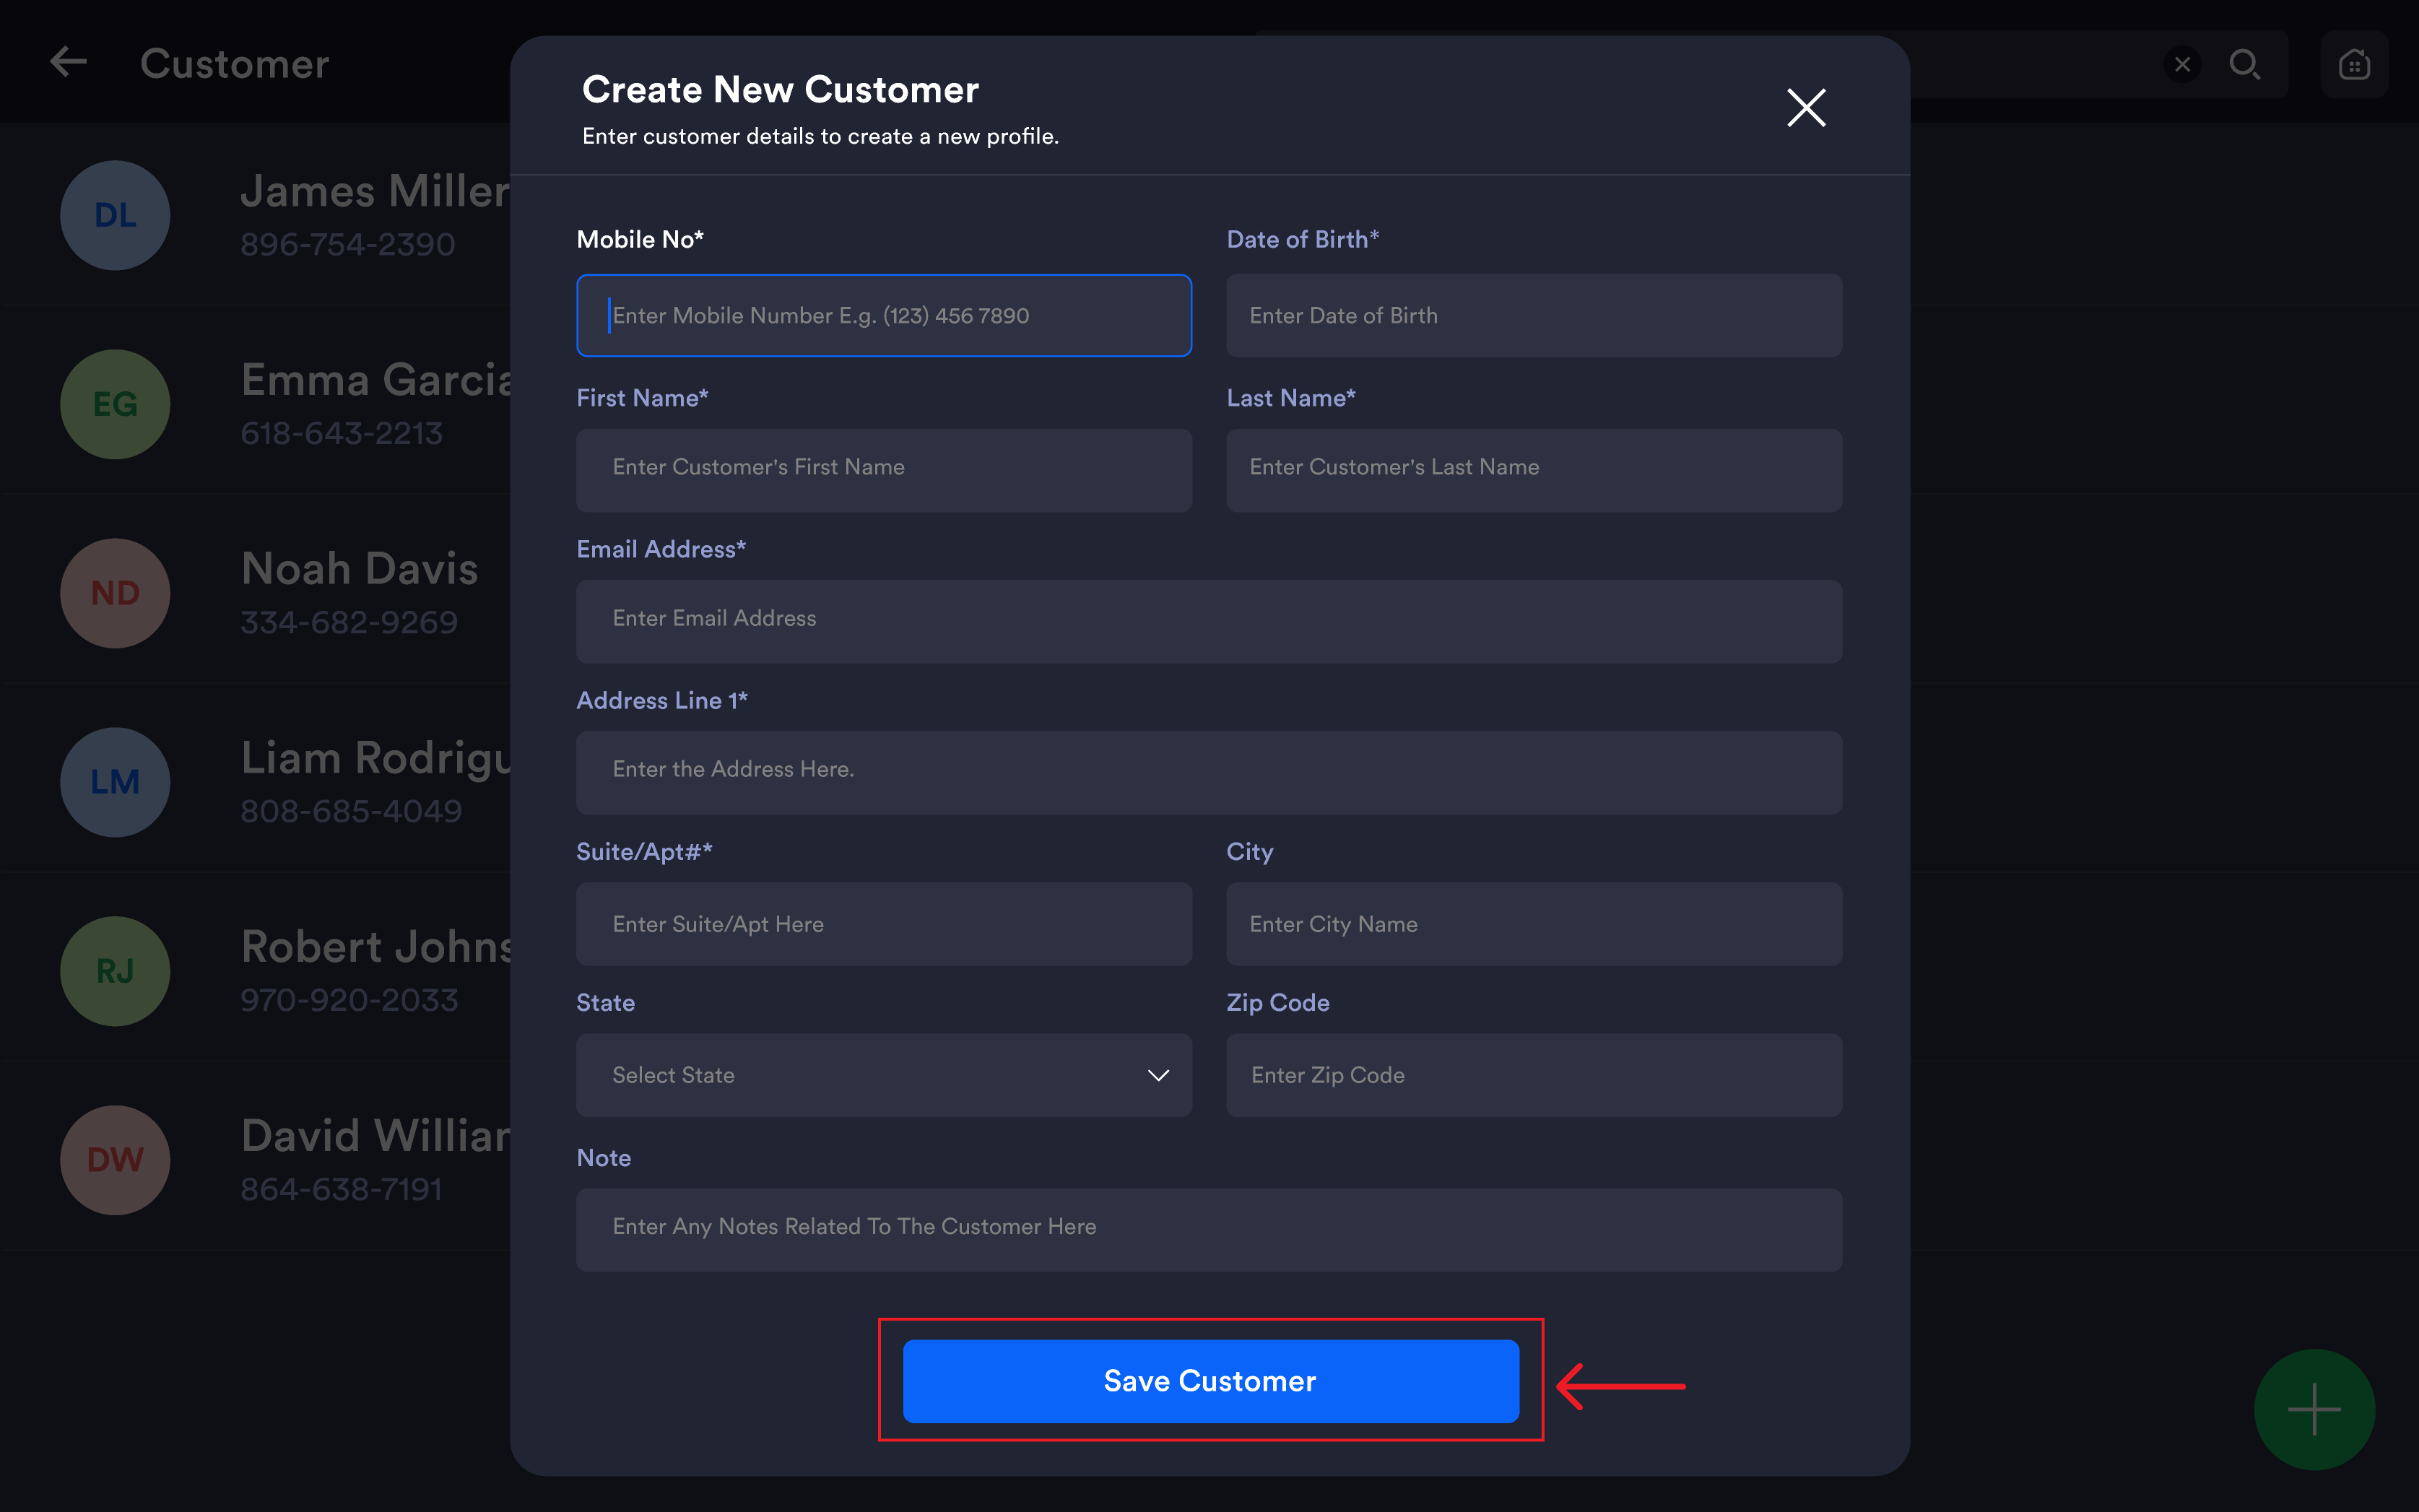
Tap Add Customer (from list) or Save (from profile) to confirm. The new customer appears at the top of the customer list.
Editing a customer profile
-
Open the customer from the list
-
Tap Edit Profile
-
Update fields — name, email, address, DOB, or notes
-
The Notes field at the bottom is for internal customer notes
-
Tap Save to confirm
Managing loyalty points
-
From the customer profile, tap the Loyalty Points Balance card
-
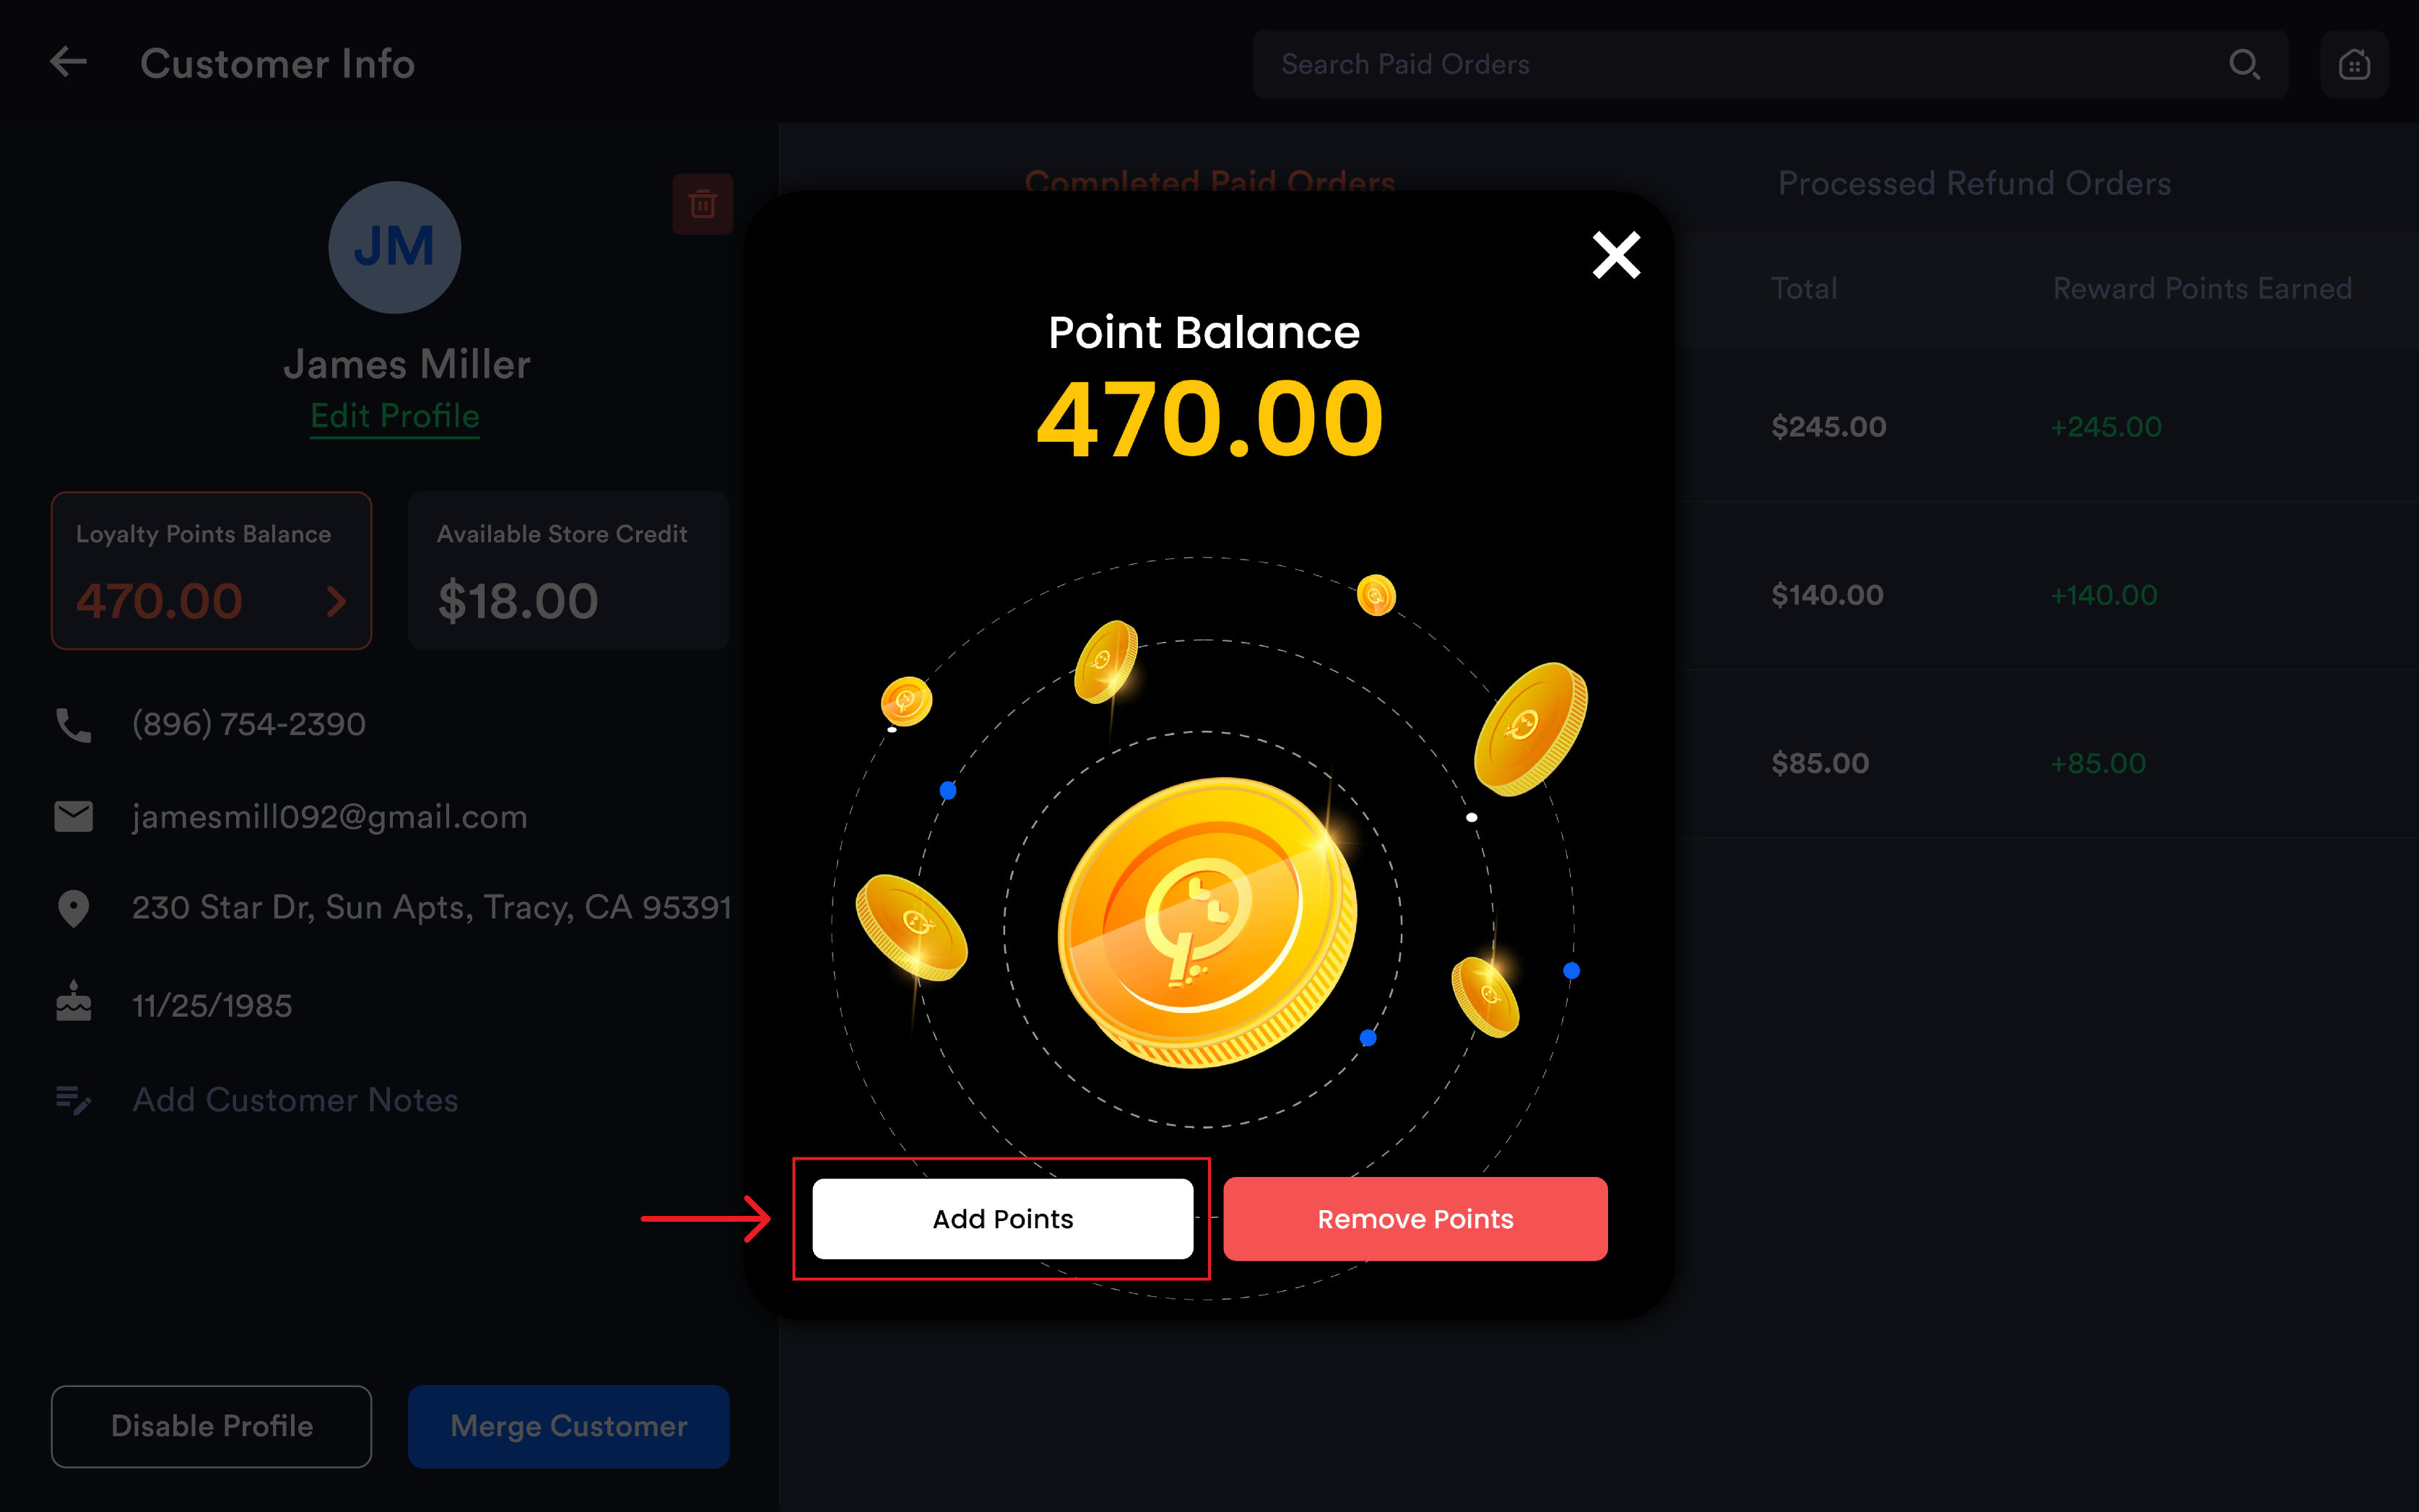
The Point Balance popup appears showing the current total
-
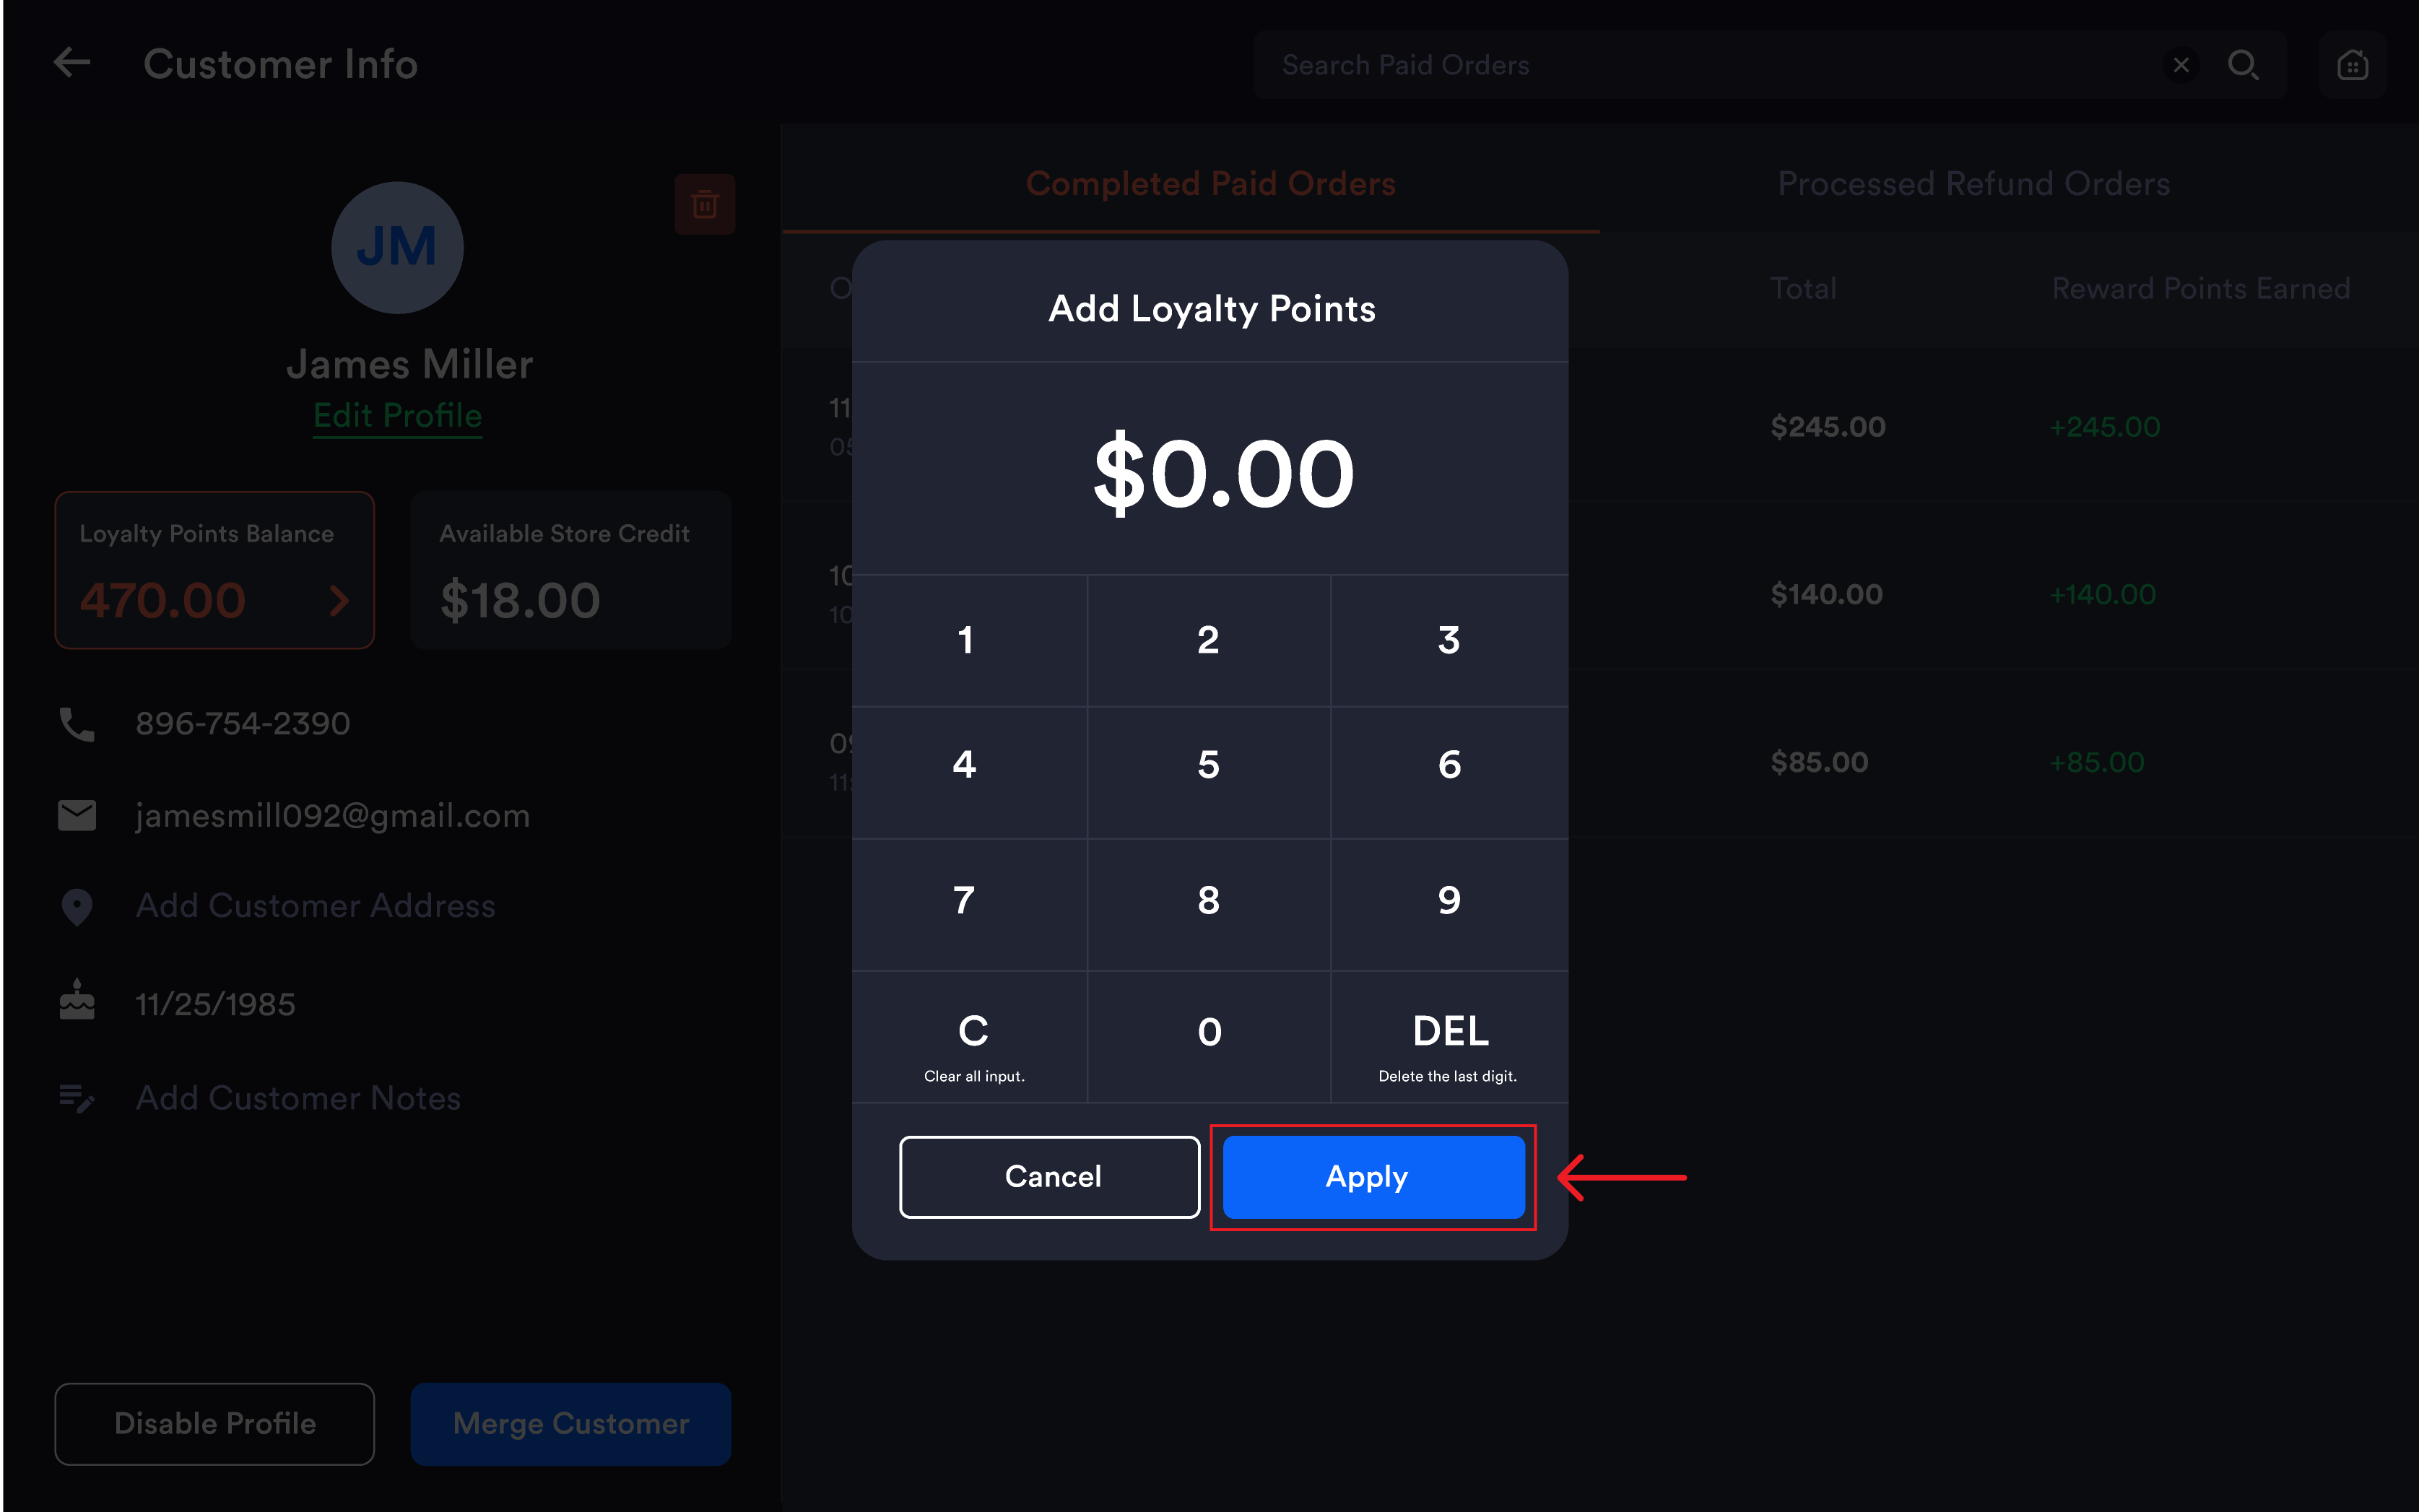
Choose: Add Points (manually add) or Remove Points (manually deduct)
Managing store credit
-
From the customer profile, tap the Available Store Credit card
-
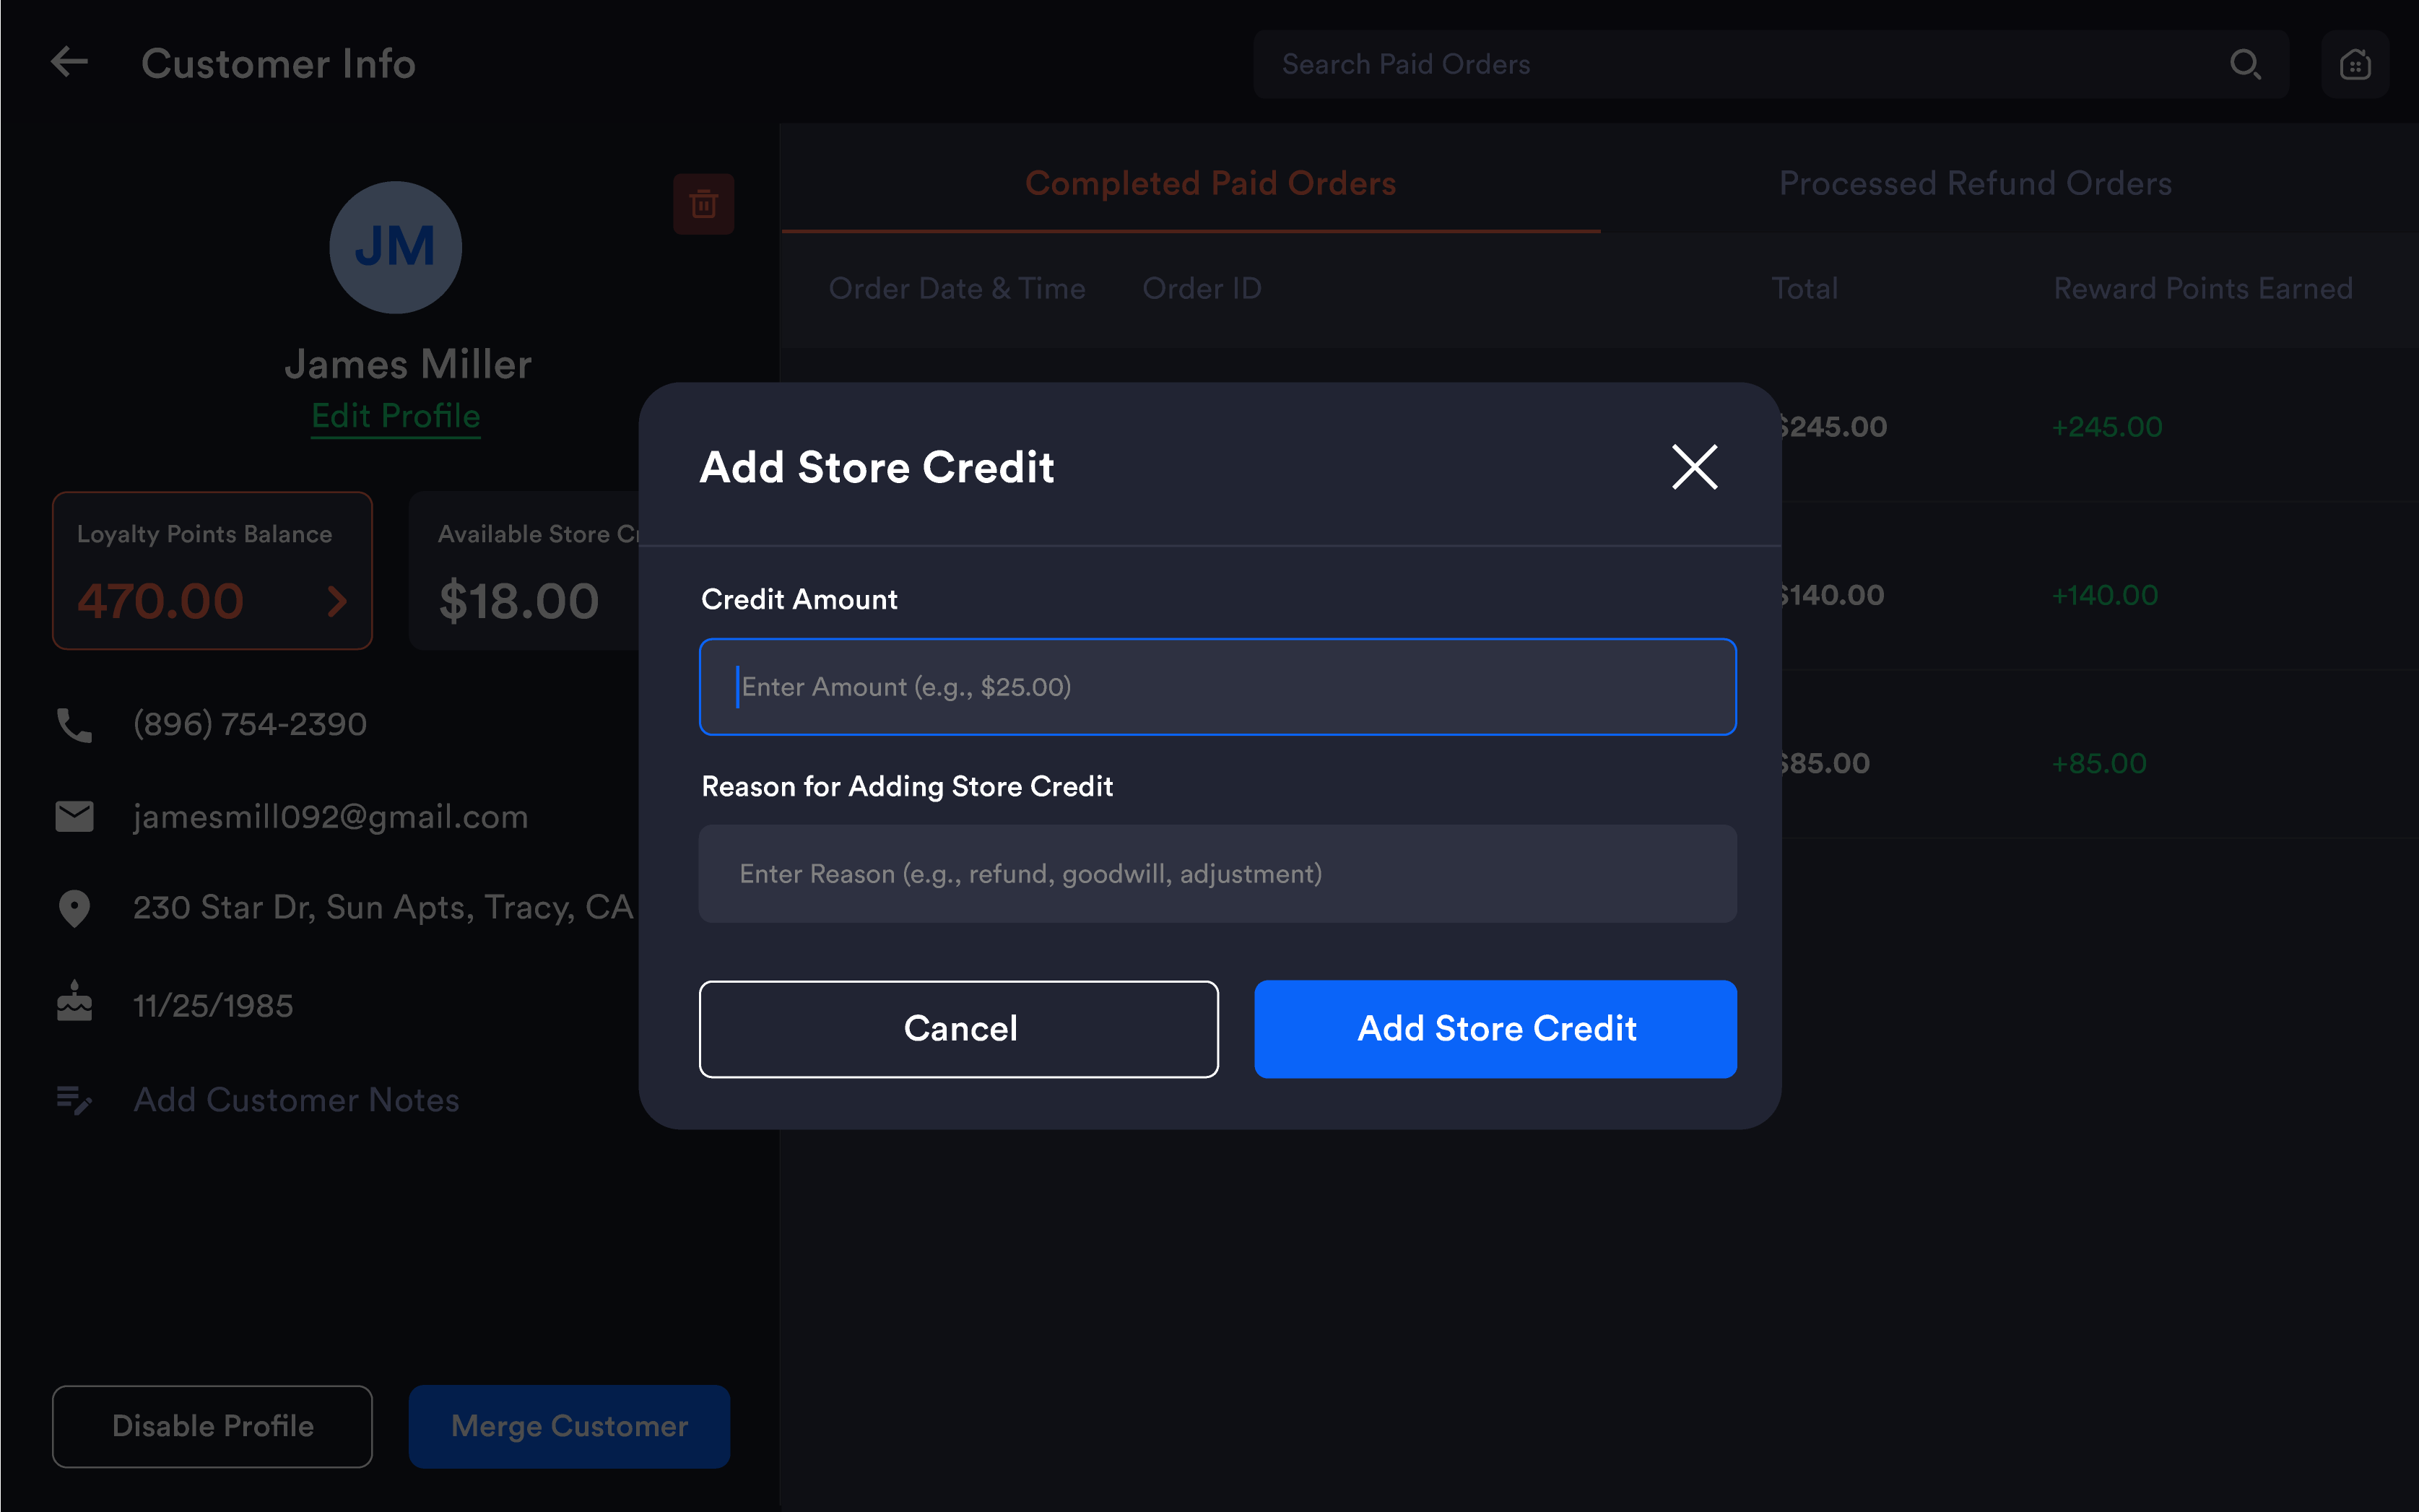
The Add Store Credit popup appears
-
Enter:
-
Credit Amount — the dollar amount to add or remove
-
Reason for Adding Store Credit — mandatory
-
-
Tap Add Store Credits to confirm
Important: The reason/note field is required for both adding and removing store credit. Submissions without a reason will not be accepted.
Viewing order history
|
Tab |
Content |
|---|---|
|
Completed Paid Orders |
Order Date & Time, Order ID, Total amount, Reward Points Earned |
|
Processed Refund Orders |
All refund transactions for this customer |
Use the Search paid order bar at the top to search within a customer's order history.
Adding customer notes
-
From the customer profile, tap Add Customer Notes
-
The customer edit form opens with a Notes field at the bottom
-
Enter the internal note
-
Tap Save to confirm
Notes are visible only to store staff and are not shared with the customer.
Disabling a customer profile
-
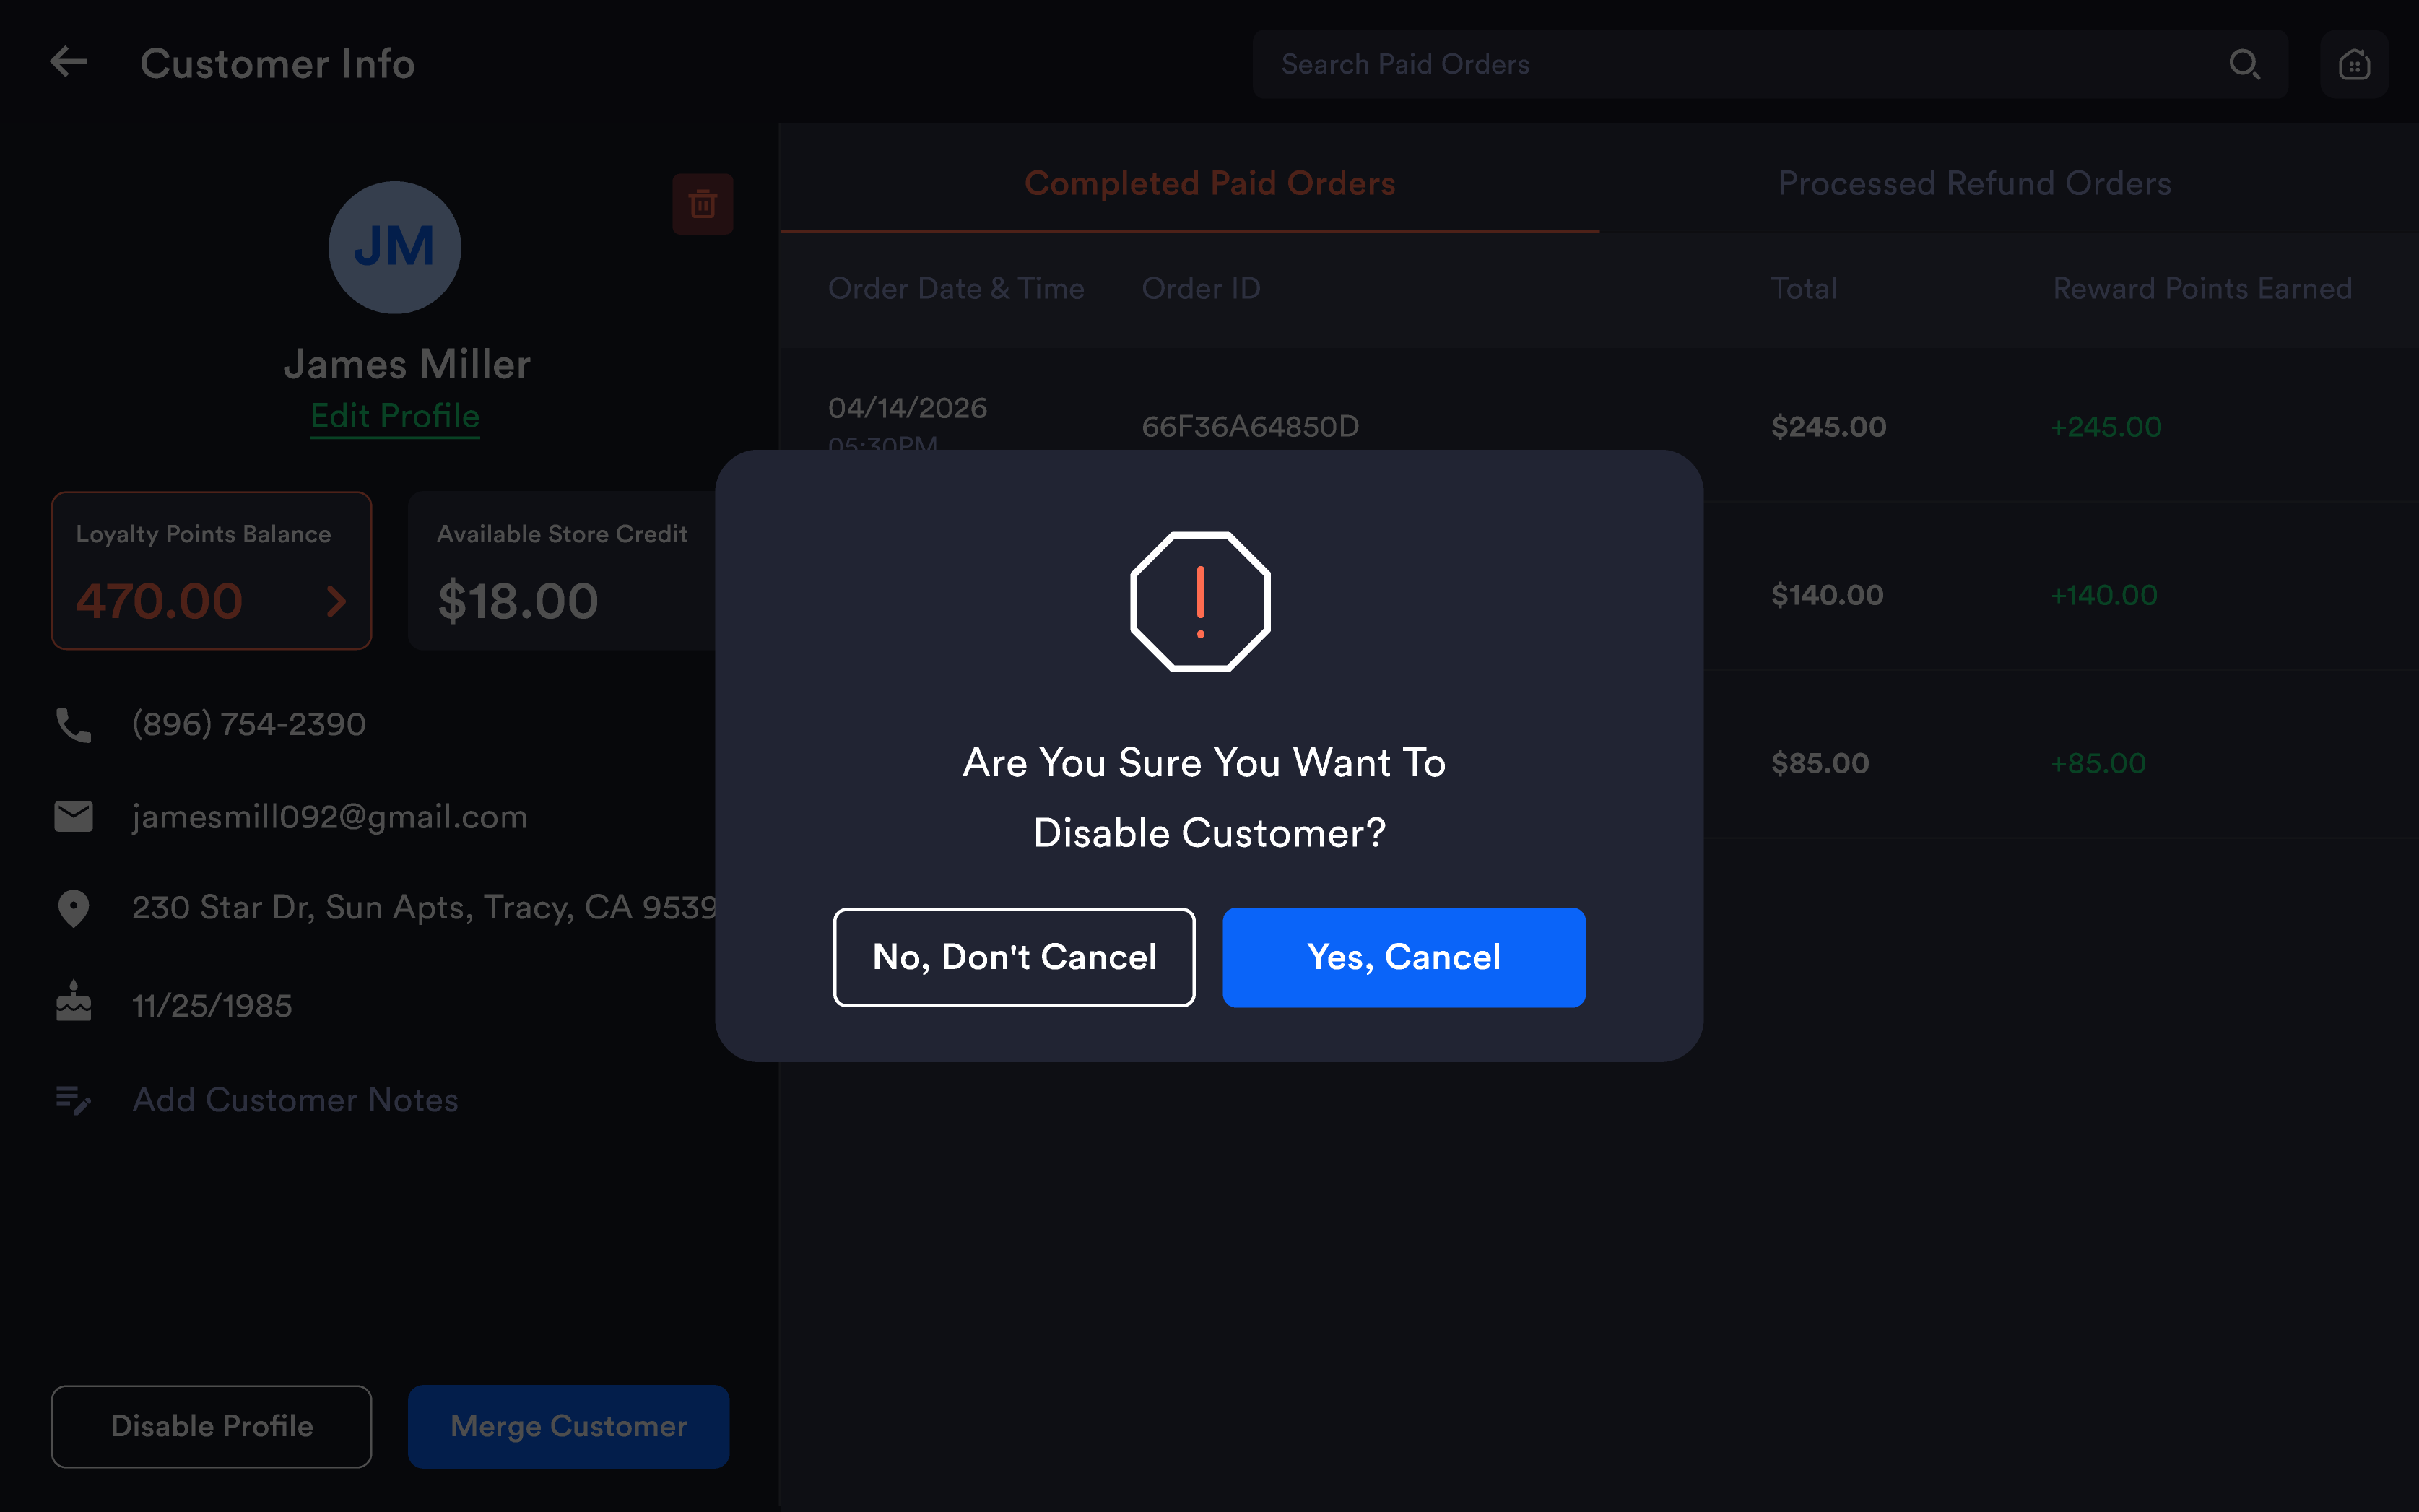
From the customer profile, tap Disable Profile
-
A confirmation popup appears: "Are you sure you want to Disable Customer?"
-
Tap Yes to confirm or No to cancel
Important: Disabled customers cannot be added to the register during a transaction. The profile remains in the system but is inactive.
To re-enable a disabled customer, open their profile and tap Enable Profile.
Merging customer accounts
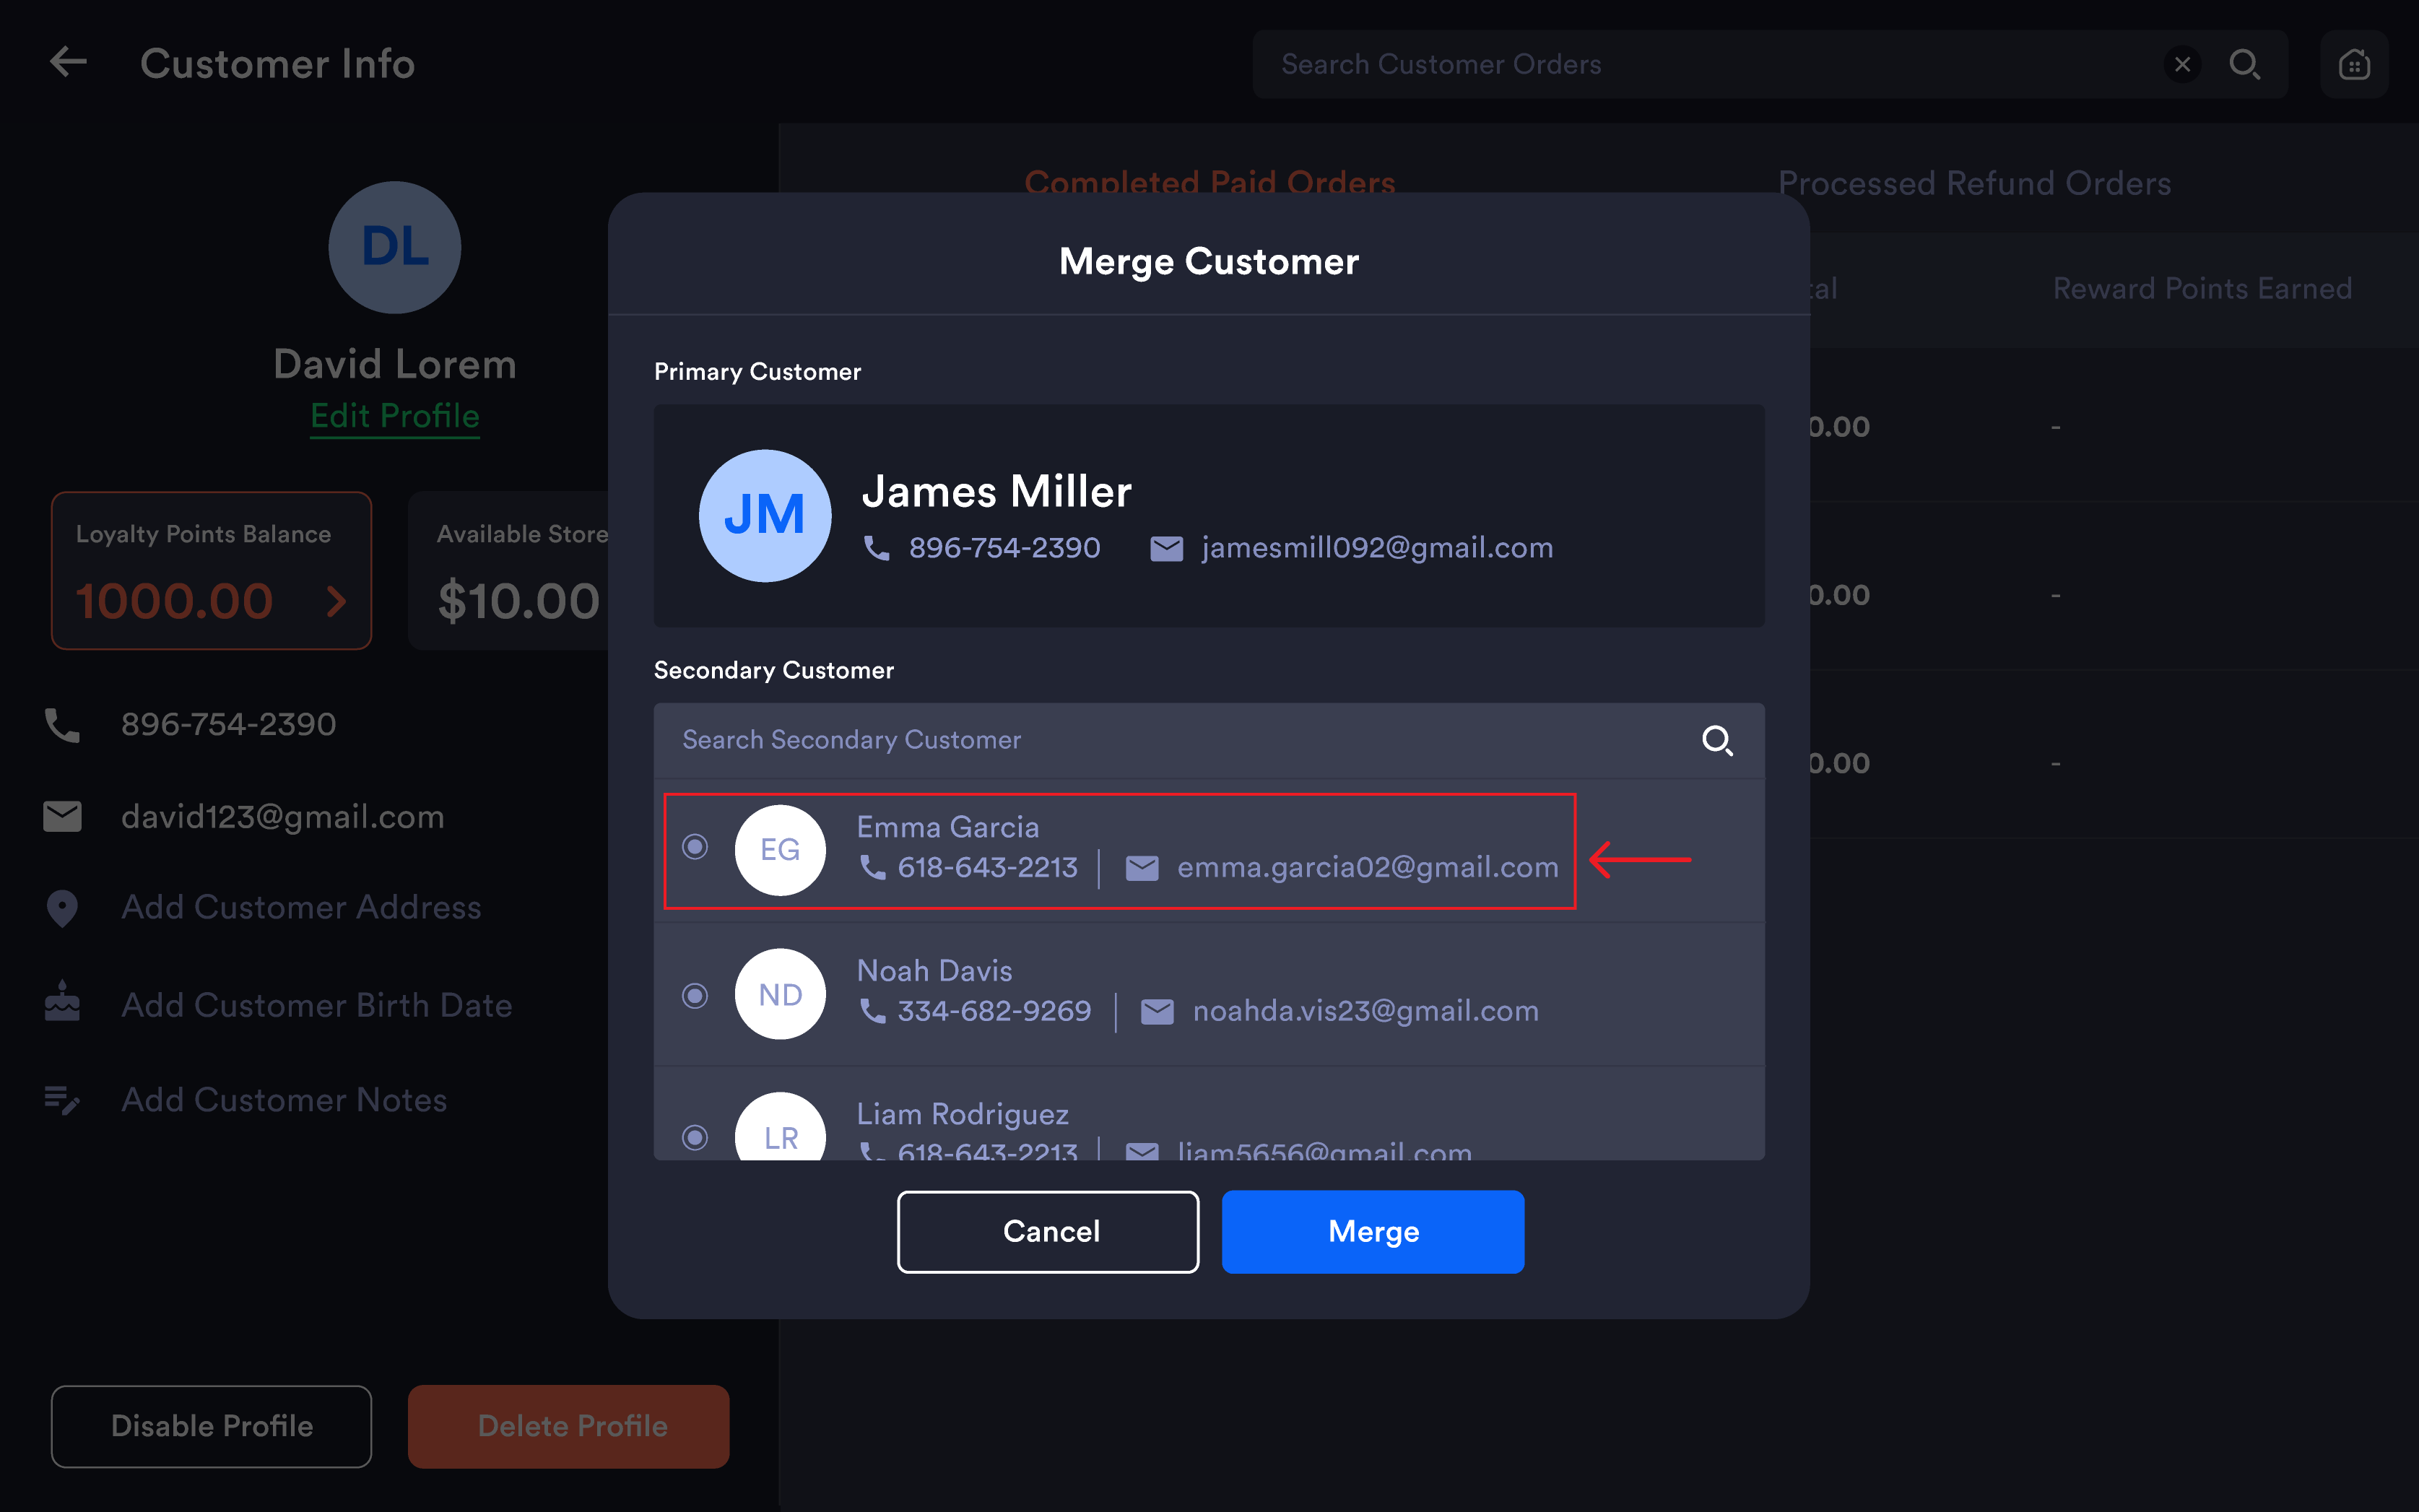
The Merge Customer feature combines two duplicate customer accounts into one, consolidating their loyalty points, store credit, and order history.
Note: Customer Merge requires the appropriate employee permission. Contact your store manager if the option is not available.
-
Open the Primary Customer profile (the account to be retained)
-
Tap Merge Customer
-20260528-101649.png?cb=4bc12f3e6ca7c8012610459bffed6216)
-
The Merge Customer popup appears:
-
Primary Customer — pre-filled (retained after merge)
-
Secondary Customer — search and select the duplicate (deleted after merge)
-
-
Use the Search Secondary Customer field to find the account to merge
-
Select the secondary customer by tapping the radio button
-
Tap Merge to confirm
Important: The Primary Customer account is always retained. The Secondary Customer account is deleted. Loyalty points, store credit, and order history from the secondary account are consolidated into the primary account.
📷 Add screenshot: Merge Customer popup
Notes & permissions
-
Customer Merge requires merchant/manager permission — configured per employee in Employee Permissions
-
Disabled customers are blocked from being added at the register
-
Newly created customers automatically appear at the top of the customer list
-
Customer search works by phone number, name, or email